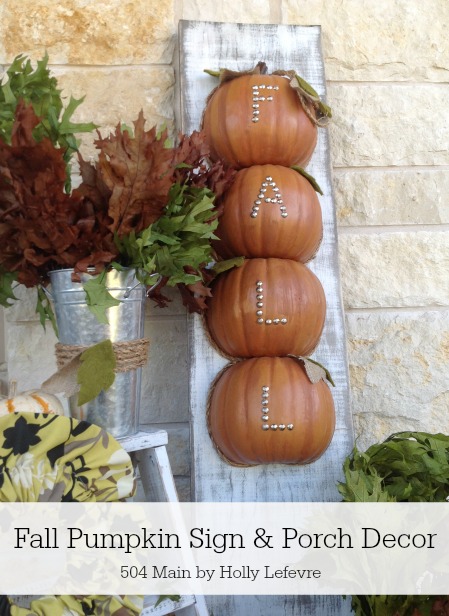
Every.single.year. I say I am going to really decorate for Fall - really decorate...and I usually just fill the porch with pumpkins....BUT finally, I really do have a beautiful Fall porch! Partnering with Oriental Trading I created this pretty pumpkin sign and Fall display. I wanted a look that would "work" throughout Fall into Thanksgiving (until the Christmas decorations come out!), and this look will do just that.
Showing posts with label Fall decor. Show all posts
Monday, October 10, 2016
Labels:
#orientaltradingcompany,
craft,
create,
Fall,
Fall decor,
front porch,
holidays,
home,
leaves,
make,
oriental trading company,
porch,
porch decor,
projects,
pumpkins,
signs,
wood sign
Saturday, November 14, 2015
While my mind has already jumped ahead to Christmas....I took a moment to come back to November and create a quick and simple GIVE THANKS Banner for Thanksgiving...or if I would have planned better it could have been for the entire Fall season.
The banner is pretty darn easy. You need to be able to paint, cut and glue. You can do that, right?
Now since Thanksgiving is right around the corner...let's get crafting!
Supplies
Make It!
Now, just decide where you want to hang it, make a loop on each end of the twine and decorate!

This post is written and created at 504 Main by Holly Lefevre
The banner is pretty darn easy. You need to be able to paint, cut and glue. You can do that, right?
Now since Thanksgiving is right around the corner...let's get crafting!
Supplies
- 2 1/2 yards Jute Webbing, cut into 7" lengths. It comes in black and red. I used black for this project.
- I chose to use black. This is available online and at fabric stores, usually in the upholstery section. I purchased this at Hobby Lobby.
- Paint.
- I used American Multi-Surface Satin in Paprika (DecoArt)
- Pouncer.
- This works better than a brush for stenciling. If you don't have a pouncer, a foam brush would be my next choice.
- Lettering.
- I used American Simple Script Stencil. I use this stencil ALL THE TIME!
- 3 yards basic twine.
- Scissors
- Hot Glue and Hot Glue Gun
Make It!
- Cover your work surface...On occasion the paint will bleed through the burlap.
- Cut the Jute Webbing into 7" lengths.
- You need 11 pieces.
- I like to notch my banners. At the center mark up about 1". Then cut from each side up to the 1" mark. OR mark up 1", fold the rectangle in half and cut while doubled.
- Stencil.
- Place some paint on a paper plate and then pouncer the pouncer into the paint. Use part of the plate to tap off excess paint.
- About 1/2" up from the notch on the bottom of the banner piece, place the bottom of your stencil (centered horizontally).
- If you are not experienced with stencils, take the time to tape the stencil down to keep it from moving.
- I just hold mine with one hand.
- Carefully pounce the pouncer loaded with paint all over the stencil.
- Carefully remove the stencil.
- Wipe the stencil clean to ensure the paint does not smear onto your other banner pieces.
- Cut a length of twine 3 yards long.
- Lay it across the table.
- Turn on the hot glue gun to heat up.
- Lay the letters out in order. Place a blank banner piece between GIVE and THANKS
- Fold over the top edge of each banner piece about 1/2" to 3/4"
- Place a line of hot glue in the fold and up the sides and across the edge.
- Place the twine in the glue in the fold and then fold over the top to sandwich the twine between the layers.
- YOU NEED TO MOVE QUICKLY SO THE GLUE DOES NOT DRY.
- Repeat until you are finished.
- I work with my letters upside down.
Now, just decide where you want to hang it, make a loop on each end of the twine and decorate!
Do You decorate for Thanksgiving?
Thursday, September 24, 2015
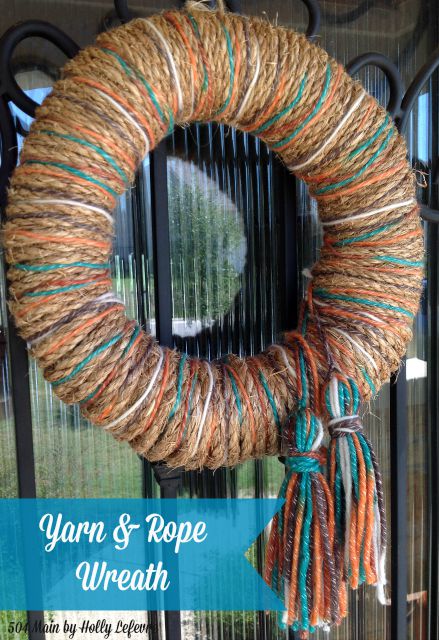
Once upon a time I lived in a quirky beach town where I could do just about anything I wanted to my house. Now I live in a new HOA-governed community and I cannot paint my door crazy colors or have lots of "treasures" hanging out on my porch...so its a good thing I love wreaths...because that is one way I can always personalize my entrance. And I do love a gorgeous wreath!
Labels:
autumn,
craft,
crafts,
DIY,
door decor,
easy,
Fall,
Fall decor,
outdoor decor,
project,
rope,
tutorial,
wreath,
yard
Monday, September 14, 2015
I have always been obsessed with tassels. I really cannot even begin to tell you how much I love them - on shoes, pillows, blankets, jewelry...everywhere and anywhere. Since I moved to Texas, I have been Tassel-less...but not anymore! I have decided to theme my Fall decor around tassels, and here is where I am starting...DIY (easy) Yarn Tassels.
Thursday, November 7, 2013
When I hear the term "Tabletop", I get all dreamy eyed and my mind starts creating and dreaming up inventive ways to do things, and well, I get a little caught up trying to create something really special - my wedding planner mentality takes over - and I spend days fretting over what to do. Visions of lighting and draping and chandeliers, and custom linens...well, you get the picture.
I truly enjoy creating a beautiful tablescape or event space.
It is one of the things that makes me so happy and really inspires my creativity.
I love creating spaces outdoors, perhaps because I am from coastal California where the weather is pretty much the same year round.
I also love creating tables with texture, interest, unexpected surprise...and most of all tables that look rich and expensive...but are not!
You have to see the rest...click on READ MORE!
Subscribe to:
Posts (Atom)