


I am really not obsessed with Christmas ornaments...well, maybe I am. A couple of weeks ago I made those A-dorable Rustic Wood Christmas Ornaments and now I seriously cannot stop thinking of ornament ideas...and what's better than incorporating photos of your kids, pets, family and close friends into homemade Christmas ornaments?!!!

So the idea for these ornaments is heavily based off of the rustic wood scrap ornaments I made, but I changed it up a bit, with the most notable change being the addition of my favorite photos of my kiddos! These are super easy and fun to make...and you get to take a walk down memory lane. I think I will be making many, many more of these!

Supplies
- Photo
- Photo Paper
- Color Printer
- Scissors/Paper trimmer
- Corner rounder (optional)
- Wood scraps
- I used 1" x 4' boards for these. I cut them to 4" long. They are approximately square (remember wood is not necessarily exact measurements). You can use larger pieces and cut them to whatever size fit your photos (within reason for a tree, of course).
- You can also purchase wood plaques from a craft store (about $1 each)
- Wood Stain or Paint, rag/rags, rubber gloves
- I used Minwax in Jacobean
- 15" Twine (or ribbon or wire if you like the look of the rustic wood ornaments)
- Decoupage medium and brush
- Embellishments (glue to affix them)
- I used some glitter snowflakes I purchased at the craft store
- Drill
- Sandpaper
- Cardboard/drop cloth to protect your work surface.

Make It
- Cut the wood to desired length (4")
- Drill holes into the corners of each square, about 1/2" in and 1/2" down.
- Lightly sand holes and cut edges before staining.

- Stain the wood by wiping the stain on with a rag (wear your gloves). Wipe off with clean rag to remove excess. Let dry.
- Sand all over, especially concentrating on the corners. Be sure to sand the back to get rid of any splinters and also sand where the drill holes are.
- I also like to sand the corners to round them out a bit.
- Print out Photos to the correct size. I printed mine out to wallet size, about 2" x 3"
- MAKE SURE THE INK IS COMPLETELY DRY BEFORE YOU CUT OR GLUE, or you will ruin your photo.
- Trim photo. If you have a die cutter, you can cut out fancy shapes (I did not think far enough ahead for that today - print out the photos large enough to use a die cutter if you like that idea - I printed mine out to the size I wanted).
- I used a basic corner rounder to round the corners of my photos.

- Dry position your photos on the wood blocks.
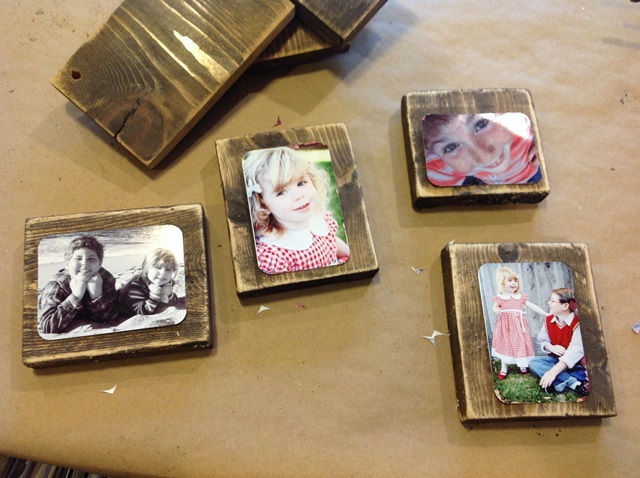
- Brush on a layer of decoupage medium all over the front of the board.

- Brush decoupage onto the back of the photo.
- Place photo on the wood, and carefully press down.

- I did NOT place any decoupage on top of my photo.
- Keep watch for a few minutes on the wood/photos. I had to push down the photo edges a bit as it dried...but when it was dry...perfection!
- Tie twine onto the wood; push twine from the back to the front; bring up a couple of inches, and tie together with the longer piece of twine (almost on top of the wood piece). I tied mine three times in a knot. Trim if necessary. Repeat on the other side. (visit the Rustic Wood Ornament for how to use wire)
- Finish it off but unraveling the ends of the twine for a fringey look.

- I also wanted some sparkle (because sparkle and scrappy wood and perfection!) so I added these snowflakes that I bought at Michaels. They had a small hole for hanging, but I easily snapped it off and just hot glued them to the ornaments.

Voila! Are these cute...and I love them because I get to look at those sweet "baby" faces!


Who are you going to put on your ornament?


The touch of sparkle really adds to these adorable photo ornaments. My current post is of Christmas too.
ReplyDeleteHolly, those wood ornaments are such a great idea! Your children are beautiful! Wishing you the very best Thanksgiving, sweet friend.
ReplyDelete