Wednesday, January 27, 2016
Monday, January 25, 2016
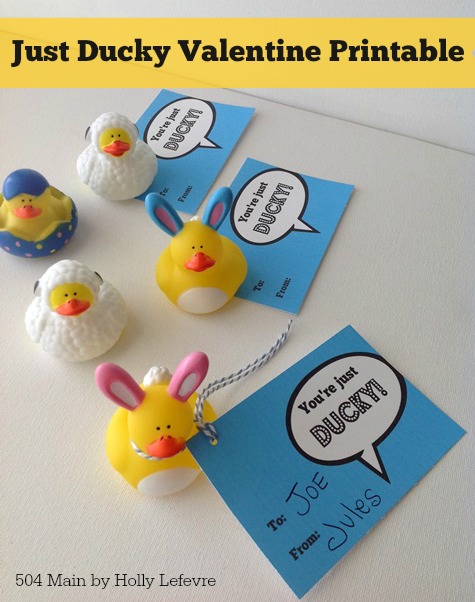
Do you remember those adorable Just Ducky Valentines from last year...well, guess what? The rubber duck OBSESSION continues!And it doesn't hurt that these ducky valentines were a big HIT last year. This year, my daughter wants to do them again (There is only one kiddo in her class from last year, so it is practically a new idea for everyone else). However, this year, I designed some CUTIE-PATOOTIE printable tags to go with them!
Thursday, January 7, 2016
We don't have snow here, even though my daughter wishes for it every night (chances are good it is not going to happen). It is cold but not that cold, but I thought with a few polar bear and Arctic inspired crafts we could create our own winter wonderland and appease her need for cold and snow.
My daughter has been super excited to go see the movie Norm of the North. Of course polar bears and all those adorable arctic creatures have something to do with it. I created -with close supervision and approval from my daughter - this CUTE tote bag inspired by Norm and I also entered it on the #NormOfTheNorthSweeps (Instagram Sweeps).
Supplies
Make It
Look at that cute face!
We loved the tote bag so much we made a sweatshirt too!It is exactly the same process, you just put it on a sweatshirt!
Who can resist a polar bear???? There are a ton of fantastic polar bear and Arctic inspired crafts on on the Norm of the North Pinterest Board.
Want a chance to win a $500 gift card or one of 5 Norm of the North Swag Bags in the #NormoftheNorthSweeps...visit the rules and upload your creation to Instagram

This post is written and created at 504 Main by Holly Lefevre
disclosure: I was asked to participate in the #NormoftheNorth Instagram Sweeps by Megan Media. This craft was created by me for that contest. No blog post was required.
My daughter has been super excited to go see the movie Norm of the North. Of course polar bears and all those adorable arctic creatures have something to do with it. I created -with close supervision and approval from my daughter - this CUTE tote bag inspired by Norm and I also entered it on the #NormOfTheNorthSweeps (Instagram Sweeps).
Supplies
- Polar Bear template (download it Bear 1 and Bear 2!)
- Blank white (or colored) tote bag. These are available at local craft stores and mass retail merchandisers.
- IMPROVISE:
- Buy a colored tote instead of what to skip the dyeing.
- This is also adorable on a sweatshirt! See photo below
- Fabric Dye. I chose to dye my bags and used a Turquoise dye - it seemed arctic and icy!
- 2 black 5/8" buttons
- White Sherpa fabric (I bought this at Michaels in the sewing area)
- White felt
- Black felt
- IMPROVISE:
- To cut costs or accumulating more supplies, white felt can be used in lieu of white sherpa fabric
- Heat N Bond Ultra (Iron, ironing board, clean white cloth/towel for pressing).
- You can try fabric glue, but I really LOVE this stuff Hot glue gun or fabric glue (for eyes)
- Scissors
Make It
- Dye your tote bag according to package directions (followed by washing an drying)
- OR
- If you are not dyeing the tote, wash and dry it before proceeding.
- READ and USE package directions for applying Heat N Bond.
- Apply heat and bond to the white sherpa fabric (make sure the face fits on the piece of fabric), the white felt, and black felt.
- Once the Heat N Bond is applied, flip the fabric over. You will trace your templates onto the backing of the Heat N Bond.
- Cut 1 face in sherpa
- Cut 1 snout in felt
- Cut 2 ears and one nose in black.
- NOTE: The sherpa will shed a bit around the cut edges.
- Remove the backing from the nose and iron it onto the snout. Use a blank/clean cloth for pressing. Trim if necessary.
- Remove the backing from the snout and iron it onto the face. Use a blank/clean cloth for pressing.
- Remove the backing from the ears and iron it onto the ears on the face. Use a blank/clean cloth for pressing.
- Remove the backing from the polar bear face.
- Place the (almost) completed face onto the tote bag, into position. Using the clean cloth, press the face onto the tote bag. (see photo above for approximate placement)
- Use hot glue to apply the buttons/eyes onto the polar bear.
Look at that cute face!
We loved the tote bag so much we made a sweatshirt too!It is exactly the same process, you just put it on a sweatshirt!
Who can resist a polar bear???? There are a ton of fantastic polar bear and Arctic inspired crafts on on the Norm of the North Pinterest Board.
Want a chance to win a $500 gift card or one of 5 Norm of the North Swag Bags in the #NormoftheNorthSweeps...visit the rules and upload your creation to Instagram
Monday, December 14, 2015
My little girl has been nicknamed "Little Miss Christmas Spirit." She LOVES everything about Christmas...and while I am a little bah humbug myself, I have to admit her enthusiasm is contagious. So, I have decided we are doing everything to instill and encourage this sweet Christmas spirit in her and hope it catches fire in the rest of us. We started off by attending The Trail of Lights in Zilker Park (Austin, Texas). My husband really wanted us to go last year, but time ran out...however, this year we had the amazing opportunity to attend the Trail of Lights on a Preview night and it was amazing! There is nothing like a good (and that's an understatement) holiday light display to get you in the Christmas spirit!
The Austin Trail of Lights began in 1965. It was much smaller in scale and was called a "Yule Fest." Last year over 400,000 people attended the Trail of Lights and it has established itself as a beloved Austin holiday tradition. Here are just a few facts I found fascinating about the #TrailofLights:
1. There are over 1 million light bulbs on the Trail of Lights.
2. It takes an estimated 15,000+ man hours to assemble the trail.
3. It takes an estimated 5000 hours to disassemble the trail.
4. There are 3,309 lights on the Zilker Park tree.
5. The Zilker Park tree is 155 feet tall, making it the worlds tallest man made free-standing tree.
Here is some great information about planning your trip to the trail.
(Please eexcuse the clarity of my photos...I need to brush up on my nighttime photography a lot!)
I have seen photos of previous years and thought it looked pretty, but seeing the Trail of Lights in person is an Throughout Zilker Park is an amazing trail full of Christmas and holiday cheer.
Tunnels of lights...
Homage paid to Austin's bat population...
Displays or cherished childhood favorites sponsored by local businesses....
Trees wrapped in lights making a magical scene...
There are Ferris wheels and carousels...
And a whole lot of family fun!
The Trail of Lights is open from December 8 through December 22. Through December 15, admission is free, and then tickets are reasonably priced.
For all of you local Austinites or those visiting the area, You may want to consider upgrading to a ZIP pass. The Trail of Lights ZIP Fast Pass, presented by HomeAway, gives you front of the line access to enter the trail at 6pm (One hour before it is open to the general public). You also have access to Kringles Kantina and HomeAway ZIP Lounge for cookies and cocoa. Passes are required for ages 6 and up. Please see more information here.
The Trail of Lights is hugely popular and the ZIP pass can enhance your experience. When we attend getting in early and being able to walk around without crowds made the experience so much more memorable.
Because this event is so popular, I highly suggest you go prepared. Check out the Trail of Lights "Plan Your Trip To The Trail" page. Also consider using the FREE app Metropia to navigate your way through the Trail Of Lights. Use their special customization for planning your visit, including how to avoid road closures and crazy parking situations.
Wherever you live, I encourage you to get out and see some lights and catch a little Christmas spirit!

This post is written and created at 504 Main by Holly Lefevre
disclosure: my family and I were invited to a Blogger Preview Night. Experiences written about are my personal opinions.
The Austin Trail of Lights began in 1965. It was much smaller in scale and was called a "Yule Fest." Last year over 400,000 people attended the Trail of Lights and it has established itself as a beloved Austin holiday tradition. Here are just a few facts I found fascinating about the #TrailofLights:
1. There are over 1 million light bulbs on the Trail of Lights.
2. It takes an estimated 15,000+ man hours to assemble the trail.
3. It takes an estimated 5000 hours to disassemble the trail.
4. There are 3,309 lights on the Zilker Park tree.
5. The Zilker Park tree is 155 feet tall, making it the worlds tallest man made free-standing tree.
Here is some great information about planning your trip to the trail.
(Please eexcuse the clarity of my photos...I need to brush up on my nighttime photography a lot!)
I have seen photos of previous years and thought it looked pretty, but seeing the Trail of Lights in person is an Throughout Zilker Park is an amazing trail full of Christmas and holiday cheer.
Tunnels of lights...
Homage paid to Austin's bat population...
Displays or cherished childhood favorites sponsored by local businesses....
Trees wrapped in lights making a magical scene...
There are Ferris wheels and carousels...
And a whole lot of family fun!
The Trail of Lights is open from December 8 through December 22. Through December 15, admission is free, and then tickets are reasonably priced.
For all of you local Austinites or those visiting the area, You may want to consider upgrading to a ZIP pass. The Trail of Lights ZIP Fast Pass, presented by HomeAway, gives you front of the line access to enter the trail at 6pm (One hour before it is open to the general public). You also have access to Kringles Kantina and HomeAway ZIP Lounge for cookies and cocoa. Passes are required for ages 6 and up. Please see more information here.
The Trail of Lights is hugely popular and the ZIP pass can enhance your experience. When we attend getting in early and being able to walk around without crowds made the experience so much more memorable.
Because this event is so popular, I highly suggest you go prepared. Check out the Trail of Lights "Plan Your Trip To The Trail" page. Also consider using the FREE app Metropia to navigate your way through the Trail Of Lights. Use their special customization for planning your visit, including how to avoid road closures and crazy parking situations.
Wherever you live, I encourage you to get out and see some lights and catch a little Christmas spirit!
Labels:
#ATXLights,
#TrailofLights,
ATX,
austin,
Christmas,
christmas decorations,
christmas lights,
Christmas traditions,
family,
Family Holiday Ideas,
holidaylights,
holidays,
texas,
trail of lights
Friday, November 20, 2015
This is a sponsored conversation written by me on behalf of Randall's
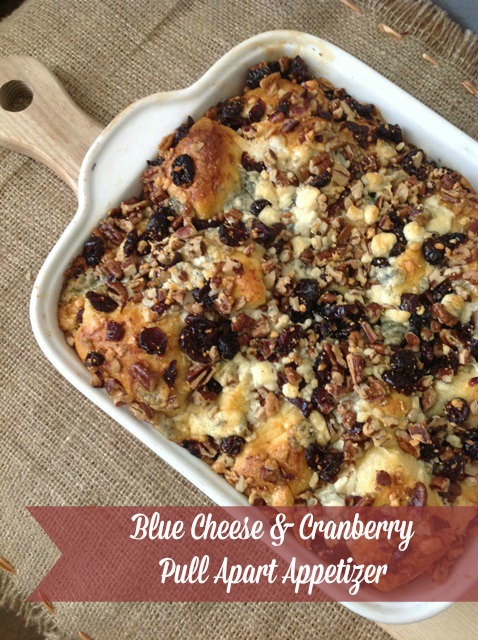
Are you ready for the holiday festivities? I know when this time of year rolls around I am always looking for easy appetizers and desserts for on-the-go entertaining and last minute social engagements. Easy to me means a few ingredients, a couple of shortcuts, and can be made quickly with minimal prep. Well, this Blue Cheese Cranberry Pull Apart appetizer fits all of those requirements!
Sunday, November 15, 2015
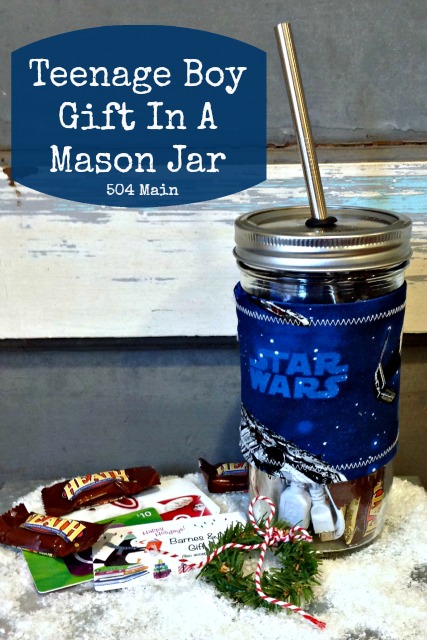
Buying Christmas gifts for my teenage boy is hard work! He has aged out of toys...well sort of, now he wants those very expensive electronic toys! LOL! It takes some thought to find smaller, affordable gifts that make him happy and make me happy. Of course, if I was going for "mom happy" there would be a vegetable-of-the-day club membership, a book, deodorant, and new socks, but you can imagine how well that would go over! Well, I think this year, I have collected a few affordable and necessary, "teenager-approved" items all nicely packaged in a Mason Jar!
Labels:
#masonjarchristmasgiftideas,
ball jars,
candy,
Christmas,
christmas gifts,
DIY holiday gift,
easy gift,
electronics,
gift card,
gift in a jar,
holidays,
mason jar,
projects,
teen,
teenage boy,
teenager
Saturday, November 14, 2015
While my mind has already jumped ahead to Christmas....I took a moment to come back to November and create a quick and simple GIVE THANKS Banner for Thanksgiving...or if I would have planned better it could have been for the entire Fall season.
The banner is pretty darn easy. You need to be able to paint, cut and glue. You can do that, right?
Now since Thanksgiving is right around the corner...let's get crafting!
Supplies
Make It!
Now, just decide where you want to hang it, make a loop on each end of the twine and decorate!

This post is written and created at 504 Main by Holly Lefevre
The banner is pretty darn easy. You need to be able to paint, cut and glue. You can do that, right?
Now since Thanksgiving is right around the corner...let's get crafting!
Supplies
- 2 1/2 yards Jute Webbing, cut into 7" lengths. It comes in black and red. I used black for this project.
- I chose to use black. This is available online and at fabric stores, usually in the upholstery section. I purchased this at Hobby Lobby.
- Paint.
- I used American Multi-Surface Satin in Paprika (DecoArt)
- Pouncer.
- This works better than a brush for stenciling. If you don't have a pouncer, a foam brush would be my next choice.
- Lettering.
- I used American Simple Script Stencil. I use this stencil ALL THE TIME!
- 3 yards basic twine.
- Scissors
- Hot Glue and Hot Glue Gun
Make It!
- Cover your work surface...On occasion the paint will bleed through the burlap.
- Cut the Jute Webbing into 7" lengths.
- You need 11 pieces.
- I like to notch my banners. At the center mark up about 1". Then cut from each side up to the 1" mark. OR mark up 1", fold the rectangle in half and cut while doubled.
- Stencil.
- Place some paint on a paper plate and then pouncer the pouncer into the paint. Use part of the plate to tap off excess paint.
- About 1/2" up from the notch on the bottom of the banner piece, place the bottom of your stencil (centered horizontally).
- If you are not experienced with stencils, take the time to tape the stencil down to keep it from moving.
- I just hold mine with one hand.
- Carefully pounce the pouncer loaded with paint all over the stencil.
- Carefully remove the stencil.
- Wipe the stencil clean to ensure the paint does not smear onto your other banner pieces.
- Cut a length of twine 3 yards long.
- Lay it across the table.
- Turn on the hot glue gun to heat up.
- Lay the letters out in order. Place a blank banner piece between GIVE and THANKS
- Fold over the top edge of each banner piece about 1/2" to 3/4"
- Place a line of hot glue in the fold and up the sides and across the edge.
- Place the twine in the glue in the fold and then fold over the top to sandwich the twine between the layers.
- YOU NEED TO MOVE QUICKLY SO THE GLUE DOES NOT DRY.
- Repeat until you are finished.
- I work with my letters upside down.
Now, just decide where you want to hang it, make a loop on each end of the twine and decorate!
Do You decorate for Thanksgiving?
Wednesday, November 11, 2015
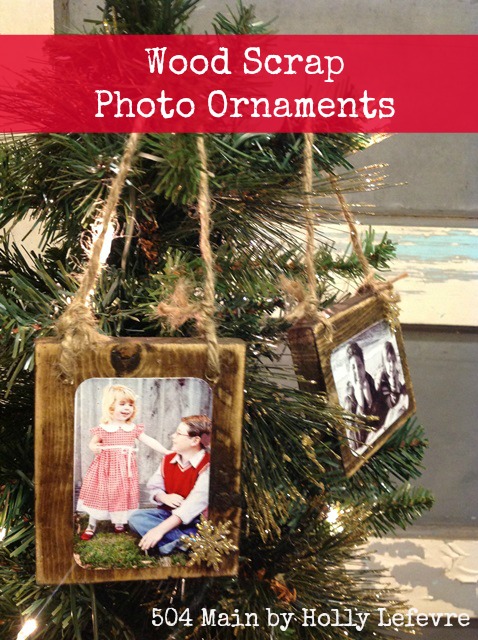
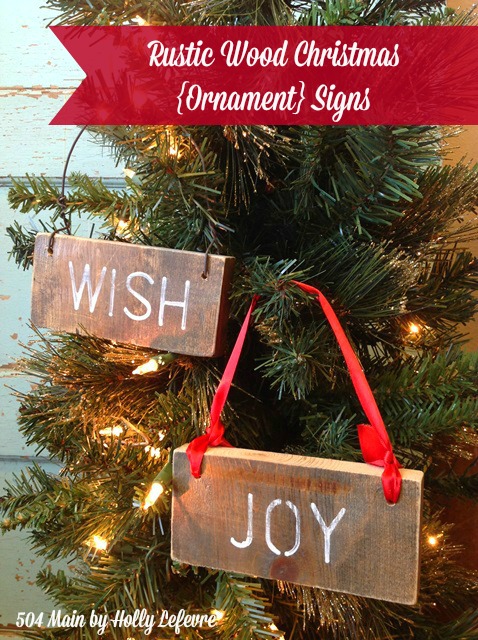
I am really not obsessed with Christmas ornaments...well, maybe I am. A couple of weeks ago I made those A-dorable Rustic Wood Christmas Ornaments and now I seriously cannot stop thinking of ornament ideas...and what's better than incorporating photos of your kids, pets, family and close friends into homemade Christmas ornaments?!!!
Wednesday, November 4, 2015
Labels:
chocolate,
cookie,
cookies,
Cornflake,
dessert,
M&M,
oatmeal,
oatmeal cookies,
recipe,
recipes
Sunday, October 25, 2015
Labels:
age wood,
Christmas,
christmas ornament,
Christmas tree,
craft,
decorate the tree,
DIY,
handmade,
handmade ornament,
holidays,
projects,
sign,
wood,
wood plaque,
wood scrap,
wood sign
Friday, October 23, 2015
I made these DIY Magical Floating Ghosts for my son's first grade Halloween party. He's 14 now...so yeah, sometimes it take me awhile to get around to sharing my ideas (I did not even know what a blog was back then!). They kids loved these little ghosts. I still have the ghost my son made in first grade and my daughter was playing with it...so it was time to revamp it and share!
Subscribe to:
Posts (Atom)