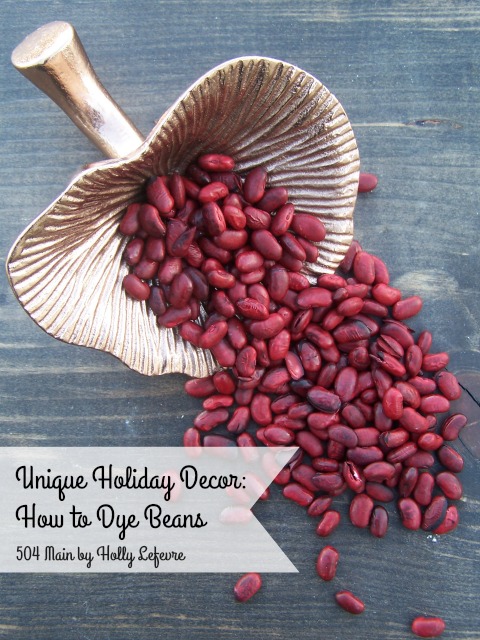
Once upon a time I dyed beans...and they looked so cool! It truly is one of my favorite DIY's every. As the beans absorbed the dye they puffed out, expanded and really turned out to look interesting and unusual. Well, this year I decided to try it again, using the color Marsala. The deep rich tones will also work well with my Christmas decor (bonus!). So go grab some beans and some dye and let's do this!
Showing posts with label My projects. Show all posts
Showing posts with label My projects. Show all posts
Saturday, February 6, 2016
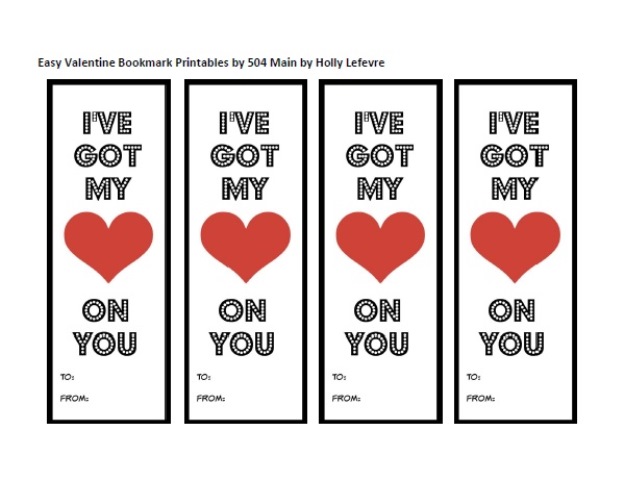
I classify these printable Valentines "oops-I-forgot-it-was-Valentines day-easy-peasy-printable -bookmarks." For some reason I am overcome with Valentines this year (which is a complete 180 from previous years - my whole life even!). I have been dreaming about kiddo Valentines. Now, all designs for Valentines MUST be 8 year old approved...and apparently she does not share my sense of humor...BUT this one passed! And it has googly eyes! BONUS!
This printable Valentine has a lot to like:
SUPPLIES
Cardstock (white)
Printer
Scissors
Elmer's glue
Template (find it here!)
Googly/Wiggly eyes (I used basic eyes, but there are colored one, ones with eyelashes - be creative!)
Optional:
Hole punch
Ribbon or thread
Make it!
Print out the template on cardstock (there are four per sheet)

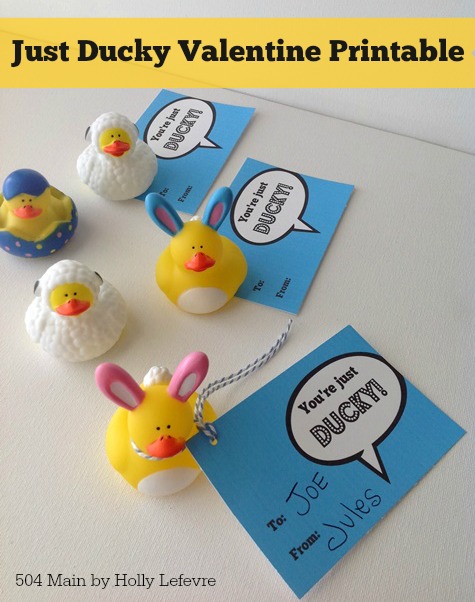
Want some more ideas...check out my JUST DUCKY printable Valentines too!

This post is written and created at 504 Main by Holly Lefevre
This printable Valentine has a lot to like:
- It is pretty cheap.
- Supplies are easy to find
- And it is quick to make!
SUPPLIES
Cardstock (white)
Printer
Scissors
Elmer's glue
Template (find it here!)
Googly/Wiggly eyes (I used basic eyes, but there are colored one, ones with eyelashes - be creative!)
Optional:
Hole punch
Ribbon or thread
Make it!
Print out the template on cardstock (there are four per sheet)

- Cut them out
- OPTIONAL: punch hole in one corner and thread 16" lengths of ribbon through
- Place a small dot of glue on each googly eye.
- Place the eyes on the heart.
- All done. That took, what, 5 minutes - so easy and so stinkin' cute!
Want some more ideas...check out my JUST DUCKY printable Valentines too!
Happy (EASY) Valentines Crafting!
Labels:
#ValentinesDay,
bookmark,
crafts,
DIY,
easy crafts,
family,
googly eyes,
kids,
kids activities,
My projects,
no candy valentine,
printable,
projects,
valentines,
valentines craft,
valentines party
Thursday, January 7, 2016
We don't have snow here, even though my daughter wishes for it every night (chances are good it is not going to happen). It is cold but not that cold, but I thought with a few polar bear and Arctic inspired crafts we could create our own winter wonderland and appease her need for cold and snow.
My daughter has been super excited to go see the movie Norm of the North. Of course polar bears and all those adorable arctic creatures have something to do with it. I created -with close supervision and approval from my daughter - this CUTE tote bag inspired by Norm and I also entered it on the #NormOfTheNorthSweeps (Instagram Sweeps).
Supplies
Make It
Look at that cute face!
We loved the tote bag so much we made a sweatshirt too!It is exactly the same process, you just put it on a sweatshirt!
Who can resist a polar bear???? There are a ton of fantastic polar bear and Arctic inspired crafts on on the Norm of the North Pinterest Board.
Want a chance to win a $500 gift card or one of 5 Norm of the North Swag Bags in the #NormoftheNorthSweeps...visit the rules and upload your creation to Instagram

This post is written and created at 504 Main by Holly Lefevre
disclosure: I was asked to participate in the #NormoftheNorth Instagram Sweeps by Megan Media. This craft was created by me for that contest. No blog post was required.
My daughter has been super excited to go see the movie Norm of the North. Of course polar bears and all those adorable arctic creatures have something to do with it. I created -with close supervision and approval from my daughter - this CUTE tote bag inspired by Norm and I also entered it on the #NormOfTheNorthSweeps (Instagram Sweeps).
Supplies
- Polar Bear template (download it Bear 1 and Bear 2!)
- Blank white (or colored) tote bag. These are available at local craft stores and mass retail merchandisers.
- IMPROVISE:
- Buy a colored tote instead of what to skip the dyeing.
- This is also adorable on a sweatshirt! See photo below
- Fabric Dye. I chose to dye my bags and used a Turquoise dye - it seemed arctic and icy!
- 2 black 5/8" buttons
- White Sherpa fabric (I bought this at Michaels in the sewing area)
- White felt
- Black felt
- IMPROVISE:
- To cut costs or accumulating more supplies, white felt can be used in lieu of white sherpa fabric
- Heat N Bond Ultra (Iron, ironing board, clean white cloth/towel for pressing).
- You can try fabric glue, but I really LOVE this stuff Hot glue gun or fabric glue (for eyes)
- Scissors
Make It
- Dye your tote bag according to package directions (followed by washing an drying)
- OR
- If you are not dyeing the tote, wash and dry it before proceeding.
- READ and USE package directions for applying Heat N Bond.
- Apply heat and bond to the white sherpa fabric (make sure the face fits on the piece of fabric), the white felt, and black felt.
- Once the Heat N Bond is applied, flip the fabric over. You will trace your templates onto the backing of the Heat N Bond.
- Cut 1 face in sherpa
- Cut 1 snout in felt
- Cut 2 ears and one nose in black.
- NOTE: The sherpa will shed a bit around the cut edges.
- Remove the backing from the nose and iron it onto the snout. Use a blank/clean cloth for pressing. Trim if necessary.
- Remove the backing from the snout and iron it onto the face. Use a blank/clean cloth for pressing.
- Remove the backing from the ears and iron it onto the ears on the face. Use a blank/clean cloth for pressing.
- Remove the backing from the polar bear face.
- Place the (almost) completed face onto the tote bag, into position. Using the clean cloth, press the face onto the tote bag. (see photo above for approximate placement)
- Use hot glue to apply the buttons/eyes onto the polar bear.
Look at that cute face!
We loved the tote bag so much we made a sweatshirt too!It is exactly the same process, you just put it on a sweatshirt!
Who can resist a polar bear???? There are a ton of fantastic polar bear and Arctic inspired crafts on on the Norm of the North Pinterest Board.
Want a chance to win a $500 gift card or one of 5 Norm of the North Swag Bags in the #NormoftheNorthSweeps...visit the rules and upload your creation to Instagram
Saturday, December 21, 2013
Oh yeah...I know it is almost 'THE BIG DAY" but after a trip to Jo-Ann Fabric and Craft Store, I am squeezing in one more craft - I just had to! This season, I have been a little slow in the holiday decorating department...in fact I planned on having a gingerbread man theme this year (and I usually don't do a theme)...but guess what...no gingerbread men. So this WISH/NEW YEARS banner is perfectly festive for our minimal decor...
Labels:
#fabulouslyfestive,
2014,
banner,
burlap,
Christmas,
craft,
create,
felt,
heat n Bond,
holiday decor,
holidays,
Jo-Ann,
joann fabric and craft,
lettering,
My projects,
new years banner,
wish
Thursday, November 14, 2013
Can you really ever have enough candles?
No and no and no!
I know that I do start to tire of the same old candles after awhile.
(that might just be my personality!)
So...what's the trick to keeping the look "fresh"?
Changing up vignettes, adding seasonal touches,
and creating interesting embellishments are the key.
I know that I do start to tire of the same old candles after awhile.
(that might just be my personality!)
So...what's the trick to keeping the look "fresh"?
Changing up vignettes, adding seasonal touches,
and creating interesting embellishments are the key.
Way back in the wedding planning days, I used these plain candles (that you can purchase at just about any grocery store or mass retailer) ALL THE TIME. I decorated them in a bajillion different ways because these beauties are chameleons - they can be transformed into whatever you want them to be...and as a PLUS, they are totally cost effective.
Sunday, December 30, 2012
As a kid I remember celebrating New Years by marching out into the street with my grandparents and all of the neighbors to bang on pots and pans.
I am not sure my neighbors would appreciate this!
As I got older I dreamed of fancy parties and getting dressed up...
and now as a mom I am content with a small gathering
(even if it is just the four of us), a nice dinner, a special dessert, and being comfy.
I am not sure my neighbors would appreciate this!
As I got older I dreamed of fancy parties and getting dressed up...
and now as a mom I am content with a small gathering
(even if it is just the four of us), a nice dinner, a special dessert, and being comfy.
Monday, January 2, 2012
This page is under construction
...more coming....
click on CREATE for more projects!
_______________________________________________________________
These are some of my favorites!
Subscribe to:
Posts (Atom)


_wm+(1).jpg)