I LOVE Fall. The weather is amazing and it is finally time to bake with my favorite flavors - nutmeg, cinnamon, pumpkin...and gingerbread! So I had some (very ugly) bananas begging to be made into bread, but felt the need to give this banana bread a Fall twist by adding the flavors of gingerbread....and a few chocolate chips (because they make life better!).
Showing posts with label sweet. Show all posts
Showing posts with label sweet. Show all posts
Sunday, August 23, 2015
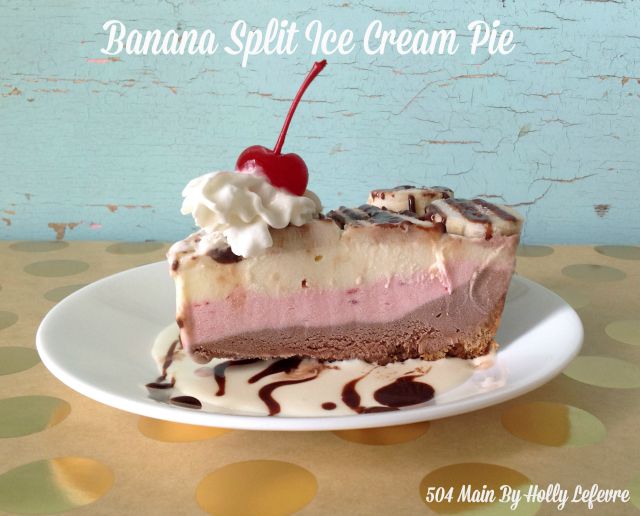
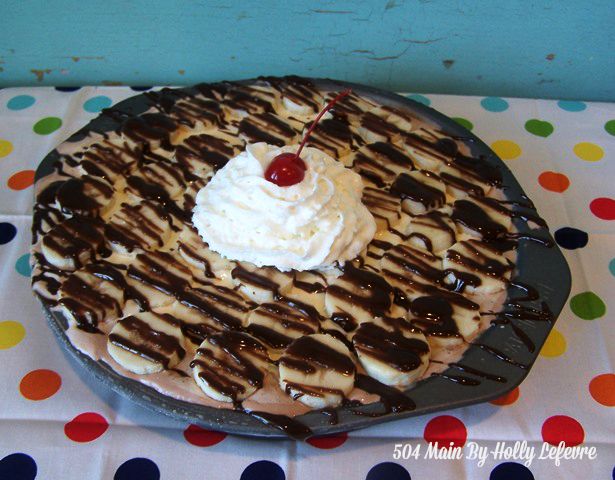
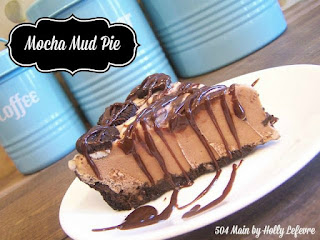
We really love ice cream in this house. I used to exercise only so I could eat ice cream (makes sense, right?). After making Mocha Mud Pie for the family, I felt inspired to make MORE ice cream pies. I have been feeling very traditional and nostalgic, and so what better "old Fashioned" flavors to put into an ice cream pie than a BANANA SPLIT! Chocolate, strawberry, vanilla, banana, hot fudge, whipped cream, cherries - whats not to love!
I did some research on what exactly was in, or on a banana split. I did not know that pineapple and strawberry toppings, along with marshmallow was a part of the traditional banana split! Did you? I took a few modern liberties with my ice cream pie, but it absolutely tastes like a luscious decadent banana split!
NOTE: You have to work quick if you live in a hot area - it is ice cream, after all! Be prepared, have your ingredients ready and your work surface prepped. If I can make this pie in the heat of a Texas summer, you can manage it too!
Ingredients
THE COOKIE CRUST
NOTE: MY daughter said she would like to try Oreo Cookie Crust next time. If you want that recipe head over to the Mocha Mud Pie I posted the other day
Once the pie crust is cooled...

NOTE: It was SUPER HOT the day I made this. I did return the pie to the freezer for about 30 minutes to firm up - it makes it much prettier and easier to cut.

This post is written and created at 504 Main by Holly Lefevre
I did some research on what exactly was in, or on a banana split. I did not know that pineapple and strawberry toppings, along with marshmallow was a part of the traditional banana split! Did you? I took a few modern liberties with my ice cream pie, but it absolutely tastes like a luscious decadent banana split!
NOTE: You have to work quick if you live in a hot area - it is ice cream, after all! Be prepared, have your ingredients ready and your work surface prepped. If I can make this pie in the heat of a Texas summer, you can manage it too!
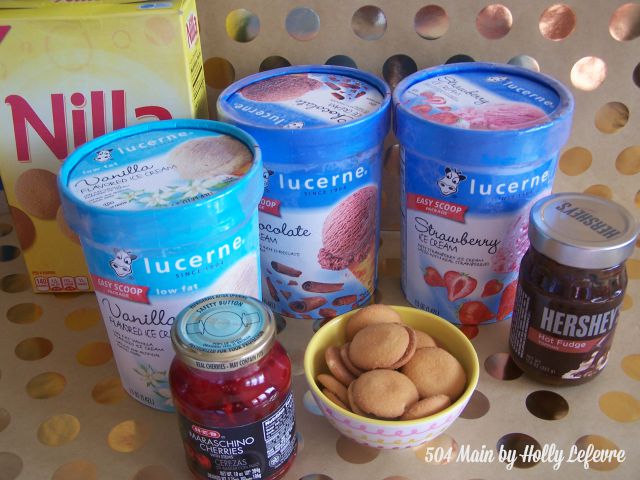
Ingredients
- 4 cups Vanilla ice cream
- 4 cups chocolate ice cream
- 4 cups Strawberry ice cream
- 1 Package Vanilla Wafers
- 5 Tablespoons butter, melted
- 1/2 cup (or less..or more!) Hot Fudge Sauce
- 3 medium bananas, sliced
- Whipped Cream
- Maraschino cherries
- Marshmallow topping
- Optional
- 1/2 cup toasted sliced almonds
- Mini Vanilla Wafers
- Pineapple (sundae) sauce
- Strawberry (sundae) sauce
- Food Processor
- Wood spoon, spatula
- Pie Tins or cake round (I used the 9" round cake pans in the Cake Boss 5-Piece Bakeware Set )
- Mixing Bowls
- Knife
- Optional: Ziploc bag (with tip cut off) - similar to a DIY piping bag.
THE COOKIE CRUST
NOTE: MY daughter said she would like to try Oreo Cookie Crust next time. If you want that recipe head over to the Mocha Mud Pie I posted the other day
- Preheat oven to 350F
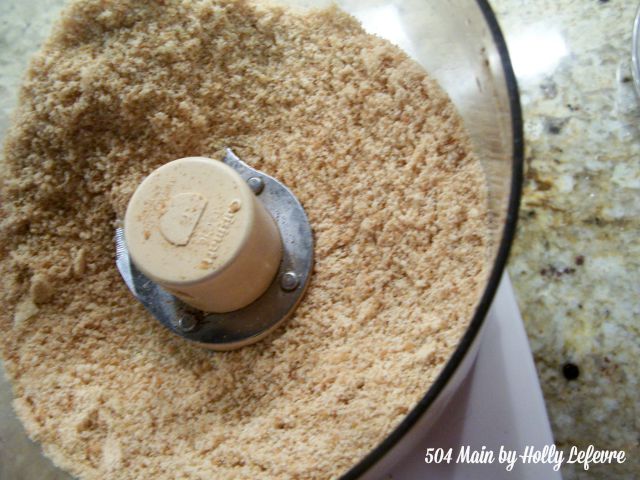
- Place about 45 Vanilla Wafers in a food processor and process until they are fine crumbs.
- Melt butter in the microwave (in a microwave safe dish) for about 30 seconds.
- In a mixing bowl, combine the cookie crumbs and butter together and mix thoroughly.
- Place the cookie crumb mixture into the pan and press down and onto the side of the pan to create a crust. I use a small glass bowl to press the crumbs down and up onto the sides firmly.
- Bake for 10 minutes in the 350F oven.
- Remove from oven and let cool completely.
Once the pie crust is cooled...
- Let CHOCOLATE ice cream soften slightly, just so it is spreadable, and spread into the bottom of the pie crust
- NOTE: I discovered this as I put my last layer of ice cream (Vanilla) on the pie and realized that next time I will do this for each layer.
- Place softened ice cream in a gallon size ziploc bag
- Snip the tip off and add the ice cream to the pie crust in a swirling motion. Start on the outside edge of the pie crust and circle your way into the middle with the ice cream.
- Then spread smooth with a spatula.
- Return pie to the freezer to let the chocolate set/harden up (essentially you are doing this if you want to achieve "clean" layers of ice cream in the pie. If you don't care about the layers appearing clean and even...keep on going!)
- REPEAT above steps with STRAWBERRY Ice Cream.
- REPEAT above steps with VANILLA Ice Cream.
- Return to freezer for 4-6 hours (or overnight)
- The ice cream part of the recipe is complete. You can see the edges of my pie are showing some chocolate. The bananas will cover it...or use mini Vanilla Wafers!

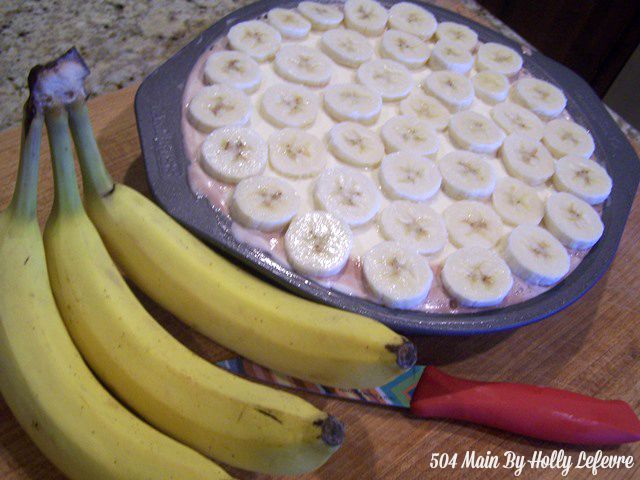
- Just prior to serving, slice the bananas and place them all over the top of the pie.
- Heat the hot fudge and drizzle it over the bananas.
NOTE: It was SUPER HOT the day I made this. I did return the pie to the freezer for about 30 minutes to firm up - it makes it much prettier and easier to cut.
- Use 1-2 Tablespoons of Marshmallow topping on the plate. I made a circle with the back of the spoon. Set the pie in the center of the marshmallow topping.
- Serve with a dollop of whipped cream and a cherry. It might be fun to set out some pineapple, strawberry, and marshmallow toppings to let your guests complete the banana split pie masterpiece!
What's your favorite ice cream dessert?
if you like this recipe, be sure to check out the Mocha Mud Pie recipe!
Wednesday, October 9, 2013
I really try to not talk about "the holidays" this early,
but last year I made homemade vanilla extract and it was a huge hit.
Thing is, you gotta make it now!
Those vanilla beans need to flavor that vodka for weeks and weeks.
So I will break my rule and share this one super easy
and much appreciated DIY Holiday Gift now!
I go through Pure Vanilla Extract by the gallons..or so it seems.
I put it in everything...pancake batter, waffle batter, coffee, oatmeal- you name it!
It is a pricey little habit...and I had no idea until about one year ago that you could make it yourself! DREAM ON! This is the best Vanilla Extract EVER (and you can make it for a GREAT price)
but last year I made homemade vanilla extract and it was a huge hit.
Thing is, you gotta make it now!
Those vanilla beans need to flavor that vodka for weeks and weeks.
So I will break my rule and share this one super easy
and much appreciated DIY Holiday Gift now!
 |
| Vanilla Apothecary Label from The Graphics Fairy |
I put it in everything...pancake batter, waffle batter, coffee, oatmeal- you name it!
It is a pricey little habit...and I had no idea until about one year ago that you could make it yourself! DREAM ON! This is the best Vanilla Extract EVER (and you can make it for a GREAT price)
Monday, July 1, 2013
I love - seriously love berries - strawberries, raspberries, blue berries and blackberries - and I jumped at this opportunity from Collective Bias® to shop for Driscoll's berries at Lucky Supermarket and create a fresh summer recipe!
Friday, May 3, 2013
This post is about birthdays.
It is about cupcakes...really good cupcakes.
The recipe is really easy.
Trust me...don't skip it!
Wednesday, April 24, 2013
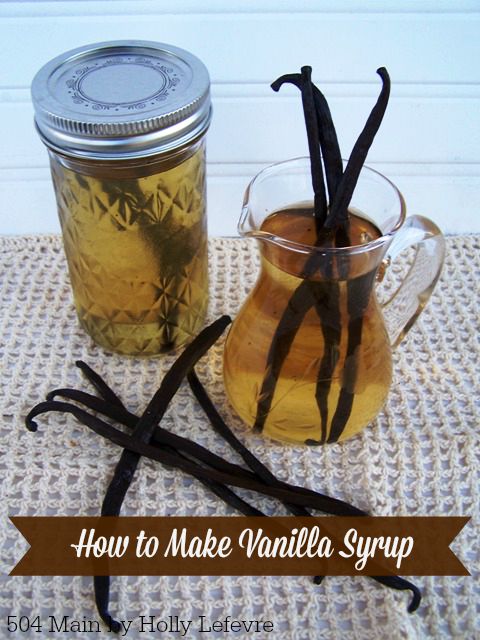
I love drinking coffee and baking and eating. I also love experimenting with different flavors and different ways to flavor beverages and baked goods and such. I have been interested in using syrups to add a special something. I decided to start with Vanilla Syrup, after all I have quarts and quarts of homemade Vanilla Extract. This was pretty much the easiest thing I have ever tried (almost!) and it is a great addition to my morning coffee, fancy beverages, and whatever else strikes my fancy!
Seriously this is super easy!
Essentially you are making vanilla flavored simple syrup.
HOW TO MAKE VANILLA SYRUP
Ingredients
(easily doubled for more sweet vanilla goodness!)
- 1 Cup Water
- 1 Cups Granulated Sugar
- 1-2 Tablespoons Pure Vanilla Extract.I make my own Vanilla Extract
- 1-2 Vanilla beans slit lengthwise (I used beans from the extract)
Make It!
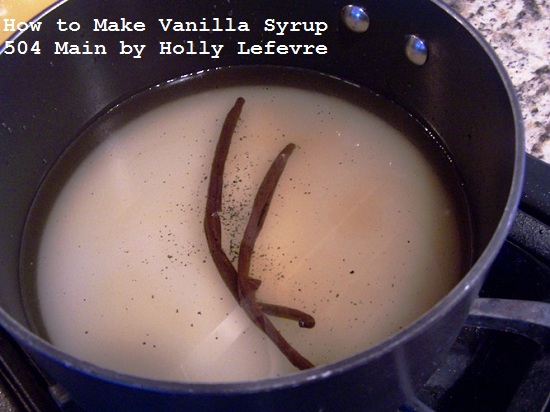
- Place the water, sugar, vanilla, and vanilla bean (slit lengthwise) in a medium sauce pan and slowly bring the mixture to a boil until the sugar is dissolved.
- Let cool, and transfer the mixture and the bean to am airtight container (I use a mason jar).
- Store in the refrigerator. I cannot quite give you a time frame for how long it will keep because we use it up quickly...a month or two is my guess!
And...folks that is it all done!
Perfect for
BAKING, COFFEE, or TEA
What do you put in your coffee? Your tea? Your cookies? Your cocktails?
Monday, April 8, 2013
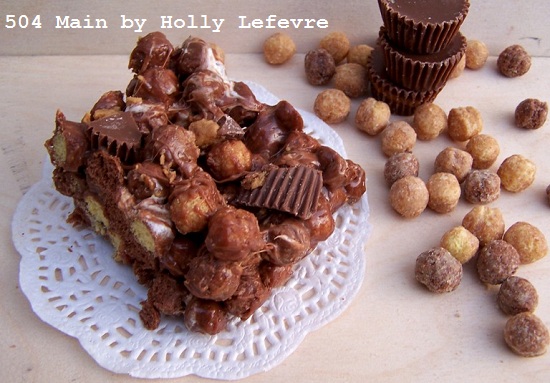
I innocently bought my kids Reese's Puffs cereal
and their sweet little imaginations dreamed up this
purely delicious chocolatey peanut buttery extravaganza!
I am convinced they are trying to torturing me this week
(in a good way..kind of) -
I am doing a Spring Detox/Cleanse
(more about that next week)!
They claim they wanted to create a special treat
for when Grandma and Grandpa come to visit
(Grandpa might just love his Reese's!)
What ever the case...these are delicious...
yes detox and all I had to try them!
Labels:
cereal,
cereal bars,
cook,
dessert,
recipe,
Reese's,
Reese's Puffs,
sweet
Monday, March 25, 2013
When it comes to Easter treats...I need chocolate -
no jelly beans - no malted things - just chocolate
and if it has peanut butter even better!
Surprisingly I have not eaten every single one of these cookies...
I have a weakness - an edible and sentimental one for Reese's.
First, I plain love them!
Second, I know to this day I can go to my parents house
and there will be ice cold Reese's Peanut Butter Cups in the refrigerator.
I am in charge of cookies for the Bunny Brunch coming up at my daughter school...and my daughter had some grand ideas about what she wanted me to make (seriously where do they get these ideas!?)...but instead I made these and she loves them..I love them..we all love them...and they are EASY!
Monday, March 11, 2013
I am always a day late and a dollar short when it comes to holiday decorating. In fact, one Christmas we almost only had lights on the tree...but I am trying and for March, I am finally keeping up (kind of) with my holidays! Last week I shared the Rainbow Bunting...and now a sweet treat!
Saturday, March 9, 2013
#LuvSoFab
Six years ago, I joined Facebook (just because)...
When I started blogging, it was for fun.
a few years later I started a blog...
then twitter, pinterest, instagram, you tube...you name it!
I had no idea the impact becoming a a full fledged tweeting, posting,
sharing, pinning member of the social media circuit would have on my life.
When I started blogging, it was for fun.
It still is...but after spending so much time on my blog,
I began to wonder how I can also make the blog work for me.
Around that same time I learned about Collective Bias and Social Fabric.
I was lucky enough to become a part of this community about a year and a half ago.
So the real question is "How
could I not #LuvSoFab?!"
Beyond the frozen yogurt parties...
Monday, March 4, 2013
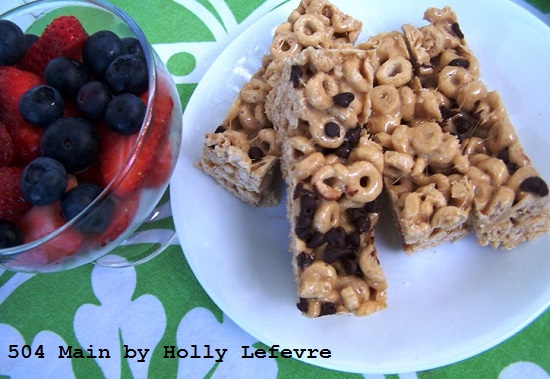
We are a cereal family. I love cereal. My husband loves cereal. The kids love cereal.
We eat it for breakfast...and snacks.
But I wanted to come up with a new way to eat cereal...
something to eat on the go and great for snacking at school.
But I wanted to come up with a new way to eat cereal...
something to eat on the go and great for snacking at school.
Saturday, March 2, 2013
It must be genetics. I have always loved to shop.
I have always loved fashion. I have always had my own style.
And so does my daughter!
At 5 she has strong opinions about what she will wear,
how she does her hair, and even creates new looks
by mixing and matching her shoes and socks, etc.
I LOVE IT! She LOVES IT!
And besides she is adorable, so how can she go wrong?
 |
| Cherry Stix Breillat Dress, Fuchsia/Purple |
and that means Easter and parties and good old fashioned Spring time fun...
and of course my girl needs some new dresses.
I decided to shop online at Cookie's Kids and let Jules select the dresses she liked
(with motherly advice, persuasion, and the ultimate veto power, if necessary).
As I mentioned, she has strong opinions about what she wears...
and this shopping trip was no exception.
Our Easter celebration is fairly casual.
We just have a low-key brunch and egg hunt with friends.
I like to have the kids look nice, and Jules especially likes to have a pretty new dress...or dresses! With the prices on at Cookie's Kids, we were able to purchase a few things, including some cute (sparkly) ballet flats!
We just have a low-key brunch and egg hunt with friends.
I like to have the kids look nice, and Jules especially likes to have a pretty new dress...or dresses! With the prices on at Cookie's Kids, we were able to purchase a few things, including some cute (sparkly) ballet flats!
 |
| Dream Girl Hearts and Stripes Dress, Lime/Black/White |
There is no hunting for sizes or colors - our choices are right there!
And there were so many choices, including Disney and Hello Kitty!
As soon as the Cookie's Kids website came up on the screen, all I heard was:
"I like that!"
"Oh that's is pretty!"
"Can I get that?"
"Oh that's is pretty!"
"Can I get that?"
 |
| Sugah and Honey Petal Pretty Dress |
It was easy to make our way through all of the choices from Girls Dresses to Boys Suits. While, yes, we were shopping for my daughter but I did pop over to take a look at the Boy's Suits for me son. He is extremely hard to shop for (for so many reasons) and I thought I would take the opportunity to see what was available just in case he needs some "fancier attire" for an upcoming event. My son's style is also very conservative, so I find my self shopping School Uniforms for supplement his wardrobe - there is a great selection of basic collared shirts and pants! We do not have to wear uniforms at our school, but after seeing this selection and the prices, I will passing along this information to some of my friends!
As we shopped, we used the Alva sizing system to determine what size Jules would need. She is very tall for her age and shopping online always presents a sizing issue, but with this easy system, I plugged in some of her info and we had the size we needed! We selected three dresses and they all fit perfectly. The Petal Pretty dress was maybe a wee bit short, but this girl loves her leggings...under everything...so it works!
Cookie's Kids has a great history and is an American success story!
1972, a young man named Cookie and his brother Marvin went into business together. They rented a 1600 square foot store in Jamaica, Queens, fixed it up, bought inventory and Summer and Fall, and opened a day after Thanksgiving with a full stock of holiday toys. The toys were a success and they put the extra money toward buying children's clothing for the next season. When that did well, they bought more clothing. The business was on it's way.
By the late 1990's there were six superstores throughout the NYC area, and though they previously had different names, by that time they were all named Cookie's Kids. Also in the late '90s came an important addition to Cookie's Kids' inventory: school uniforms. It was the steady success in uniform sales that paved the way for founding CookiesKids.com in 2007, which originally sold uniforms and soon after the entire Cookie's Kids Inventory.
Cookie's Kids now has 7 stores in the NYC area: Bronx, Brooklyn, and Jamaica...and you can shop Cookie's Kids online as well!
I was really impressed with the selection of clothing and the prices.
My daughter LOVES her new dresses!
She has already decided the Hearts and Stripes Dress is for St. Patrick's Day
I was really impressed with the selection of clothing and the prices.
My daughter LOVES her new dresses!
She has already decided the Hearts and Stripes Dress is for St. Patrick's Day
The Petal Pretty Dress is for Easter
And the Breillat Dress is her favorite -
I may not be able to get it off her.
It is for everything!
Be sure to visit Cookie's Kids and follow along on
facebook and twitter for updates and specials!
Now...I need to do some more shopping!
facebook and twitter for updates and specials!
Now...I need to do some more shopping!
Wednesday, February 27, 2013
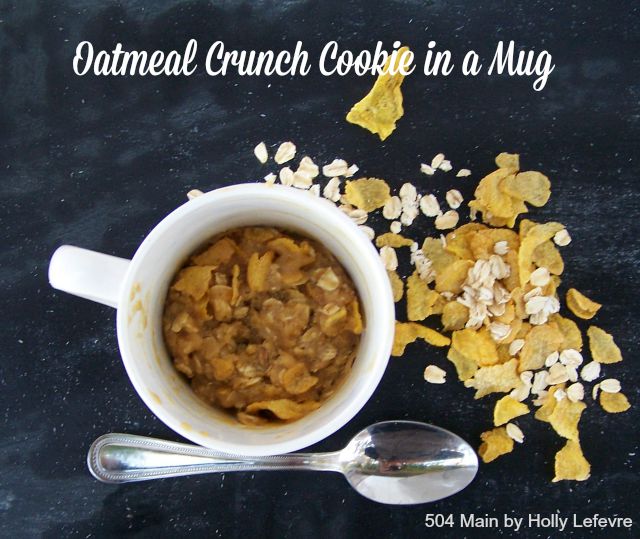
Yesterday I shared a recipe for Molten Marshmallow Fudge Cake in a Mug. While I remember something similar from my childhood, I had forgotten how yummy and fun these are to make...and now I am kind of hooked on these easy peasy single serving fresh from the (microwave) oven treats! So, of course, I had to try more...but this time a cookie!
Thursday, February 21, 2013
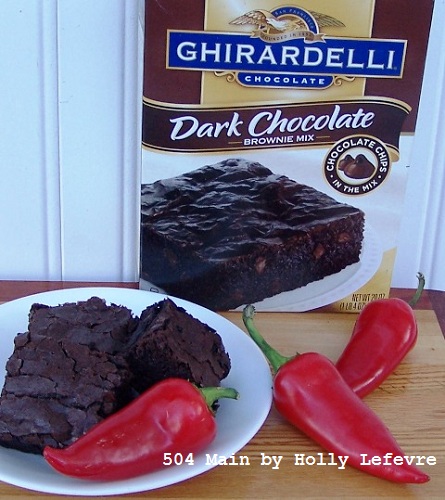
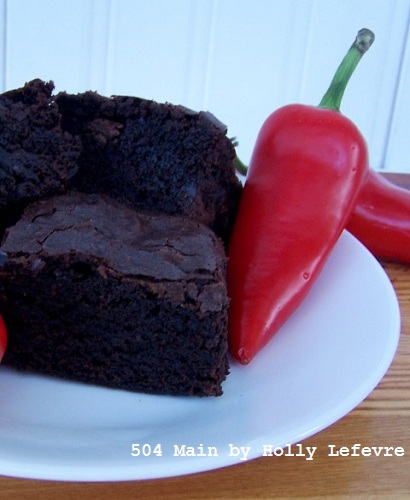
BROWNIES!
Let's stop and dream for a minute abut a world of chocolatey brownie goodness.
Let's stop and dream for a minute abut a world of chocolatey brownie goodness.
OK...back to reality.
I have sort of been obsessed with playing with spices
and introducing savory elements into sweet dishes.
I made these brownies on Superbowl Sunday and they were a hit. I think I may even like them more than regular brownies!
I have sort of been obsessed with playing with spices
and introducing savory elements into sweet dishes.
I made these brownies on Superbowl Sunday and they were a hit. I think I may even like them more than regular brownies!
And, yes...maybe even more than s'mores!
Better yet..this is so simple to do.
I actually used a box mix for these brownies
(I have yet to make brownies from scratch still...shhh...don't tell!)
but of course you can add the spices to a homemade mix!
For
us this was just enough of a kick - you can still taste the yummy dark
chocolate brownie but get a little surprise from the added spices!
1 box of Dark Chocolate Brownie Mix. I used Ghirardelli Dark Chocolate Brownie Mix
1/4 Cup Water
1/2 Cup Vegetable Oil
1 egg
1 teaspoon chili powder
3/4 teaspoon red cayenne pepper, ground
1 teaspoon cinnamon, ground
1 9 x 9 pan
BAKE IT!
Preheat oven to 325F
Prepare baking pan by spraying with cooking spray.
Prepare mix; place the mix in a bowl.
Add the chili powder, cayenne pepper, and cinnamon to the dry mix and combine thoroughly.
Add the water, vegetable oil, and egg to the mix.
Stir until fully mixed.
Place batter in prepared pan.
Bake for 40-45 minutes.
Cool completely.
Cut into 2 inch squares and serve.
Cut into 2 inch squares and serve.
Of course these are yummy and fun if you bake them in a jar too!
You may want to label your brownies so people know they have a kick!
See how easy that is!?
Whatcha think?
Ready to try some spicy brownies?
If sweet brownies are more your thing...yesterday I had a
amazing guest post for Caramel Brownies (you must go check it out!),
Ready to try some spicy brownies?
If sweet brownies are more your thing...yesterday I had a
amazing guest post for Caramel Brownies (you must go check it out!),
Have you entered the AWESOME GIVEAWAY for a Blendtec Blender?


Subscribe to:
Posts (Atom)


