


I am ready to start planting and sprucing up the house with greens and blooms.
And of course adding a pretty pot to dress up the plant is always a PLUS!
As part of the Michaels and Hometalk Pinterest Party I saw these little pots...
and was totally intrigued...so naturally I had to give them a whirl!

Visit Hometalk using the hashtag #mpinterestparty to see a ton of great projects!
On Sunday, February 16 join some Fabulous Hometalk Bloggers all over the U.S. and even parts of Canada to craft some Pinterest Inspired projects!
I will be at the Marina, CA store demonstrating and helping...
and I am sure being inspired by you all as well.
(see the bottom of this post for a few details or yesterdays
Michaels/Hometalk Pinterest Party post for complete details)


I also created 2 projects using burlap and wood:
and a Burlap Canvas and Wood Wreath
(at the bottom of this post is a linky with everyone's projects!)
(at the bottom of this post is a linky with everyone's projects!)
Here is how to make these pretty pots!
Supplies
- Craft Paint like DecoArt Multi Surface Acrylic, your choice of color. I used white
- OR
- White Gesso
- Note: The white paint is inexpensive and easy to use (you have probably even used it before!).
- The Gesso is thicker, more expensive, and gives a more opaque coverage right away.
- I tried this project with both - they both worked equally well.

- Paintbrush-I like the bristly one for this
- Terra Cotta pots, you choice of size
- Sandpaper (optional)
- Clear Acrylic stamps (they bend)
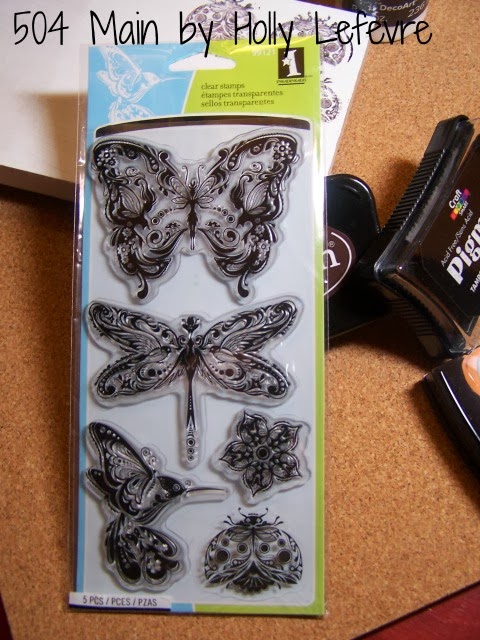
- Stamp Pad. I used Staz On in Timber Brown
- Clear acrylic sealer (I did not use it)

Make It!
- Paint the pot (I like to paint it horizontally). Using the bristly brush you will see "streaks". I like that. If you do not use a foam brush. Paint all over. Apply the number of coats you desire in terms of opaqueness on the pot. I did 2 coats. I also paint the inside rim of my pot down about 1-1.5"
- Let dry.
- Scuff with sandpaper if desired (mostly around the rim)
- Select a stamp and on a (protected) hard surface lay the stamping side of the stamp face up. I used the stamp pad to stamp the stamp instead of the usual way. Stamp all over the stamp, covering all details.

- Lay the pot on its side and determine the position for the design.
- Carefully, holding one edge of the stamp, roll the stamp onto the pot from left to right. Do NOT push too hard and do not move the stamp. In fact, do not reapply pressure...I found the stamp tends to "slip" when you do that. to recap:
- Place stamp on pot using a rolling motion
- Lightly apply pressure all over the stamp - keep stamp in place by holding with one finger.
- Lift stamp off quickly.
- Let dry.

- Spray with a clear sealer if desired.


Pretty, no?

For more #OutdoorIdeas...check out Hometalk!


I like the painted pots and decal project you show here.
ReplyDeleteThanks for sharing this tutorial, Holly. You did a great job on the flower pots and I really enjoyed the Michael's Pinterest inspirations!
ReplyDelete