I had a challenge - shop (that's not hard) at Jo-Ann Fabric and Craft Stores
and create a "Spooky Space."
I never back away from a challenge, but since my house is for sale,
my decorating at home is limited...so I asked my local coffee hangout (AHHH Crema!)
if I could decorate their mantel with some
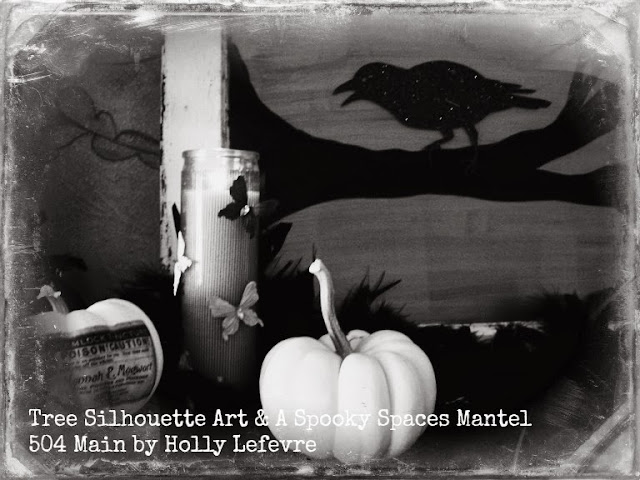
DIY Tree Silhouette Art & Seasonal Decor.
I was so excited and so inspired.
When all was said and done, I actually designed 2 mantels for the
Jo-Ann Fabric and Craft Stores #spookyspaces campaign!
It was so fun to Celebrate the Season with Jo-Ann.
It was so fun to Celebrate the Season with Jo-Ann.
The coffee house now has one spooky mantel and one lighter and more ethereal,
more "autumn fairy like" (tutorial coming!)
Today, I am going to show you how I put together this Spooky Space
and how to make the centerpiece(s) of the mantel,
the Tree Silhouette Window Art.
Spooky Tree Silhouette Art
I bought my supplies at Jo-Ann Fabric and Craft Stores!
- 1 Old window OR a Picture Frame (I used an old window because it matched the decor of the space I was decorating...a picture frame from Jo-Ann will work just as well - I know I tried it - see bottom of the post!)
- Tree Silhouette found HERE (you will need to blow it up to fit your window/frame)
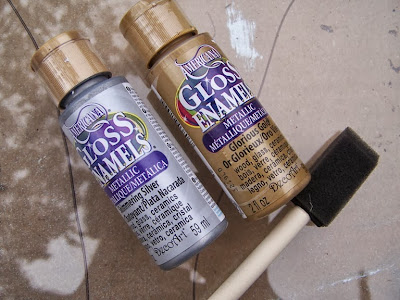
- DecoArt Gloss Enamels, Shimmering Silver and/or Glorious Gold
- DecoArt Gloss Enamels, Black
- Paintbrushes: I used 2- 1" foam brushes and one smaller tapered brush
- Martha Stewart Crafts Silhouettes, Glittered Crows
- Optional, Sharpie
MAKE IT!
Step 1:
Wash the window/glass and/or rub with rubbing alcohol to ensure the surface is clean and free of oils and dirt. I started with this window I had been using to display jewelry.
Step 2:
Decide on the size and enlarge if necessary, then print out the Tree Silhouette.
Step 3:
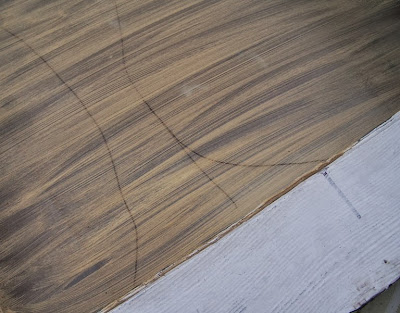
Trace your tree silhouette on the FRONT of the glass. I used the template as a guide and free-handed the tree silhouette on the front of the glass, slightly off center.
NOTE: If you are not confident with your free-handing ability, here are other options for getting the silhouette on the glass:
A) Place the outline on the BACK of your window/glass. Tape it to secure, flip it back over, and outline (on the front) in sharpie.
OR
B) Print out the silhouette and enlarge as necessary. Then cut it out, place it on the front, and trace around the silhouette.
Step 4:
Flip the window over so the back is facing up.
Use the foam brush and paint (I painted horizontally) the Silver (or your color choice) Gloss Enamels over the entire surface (Use painters tape if you need to keep the paint off the frame). Let dry. Use 2 coats, letting dry completely between coats.
NOTE: If you are using a window or framed glass you may be able to flip the window over (back and forth) to work on both sides simultaneously because the frame will keep the glass from resting on the work surface.
Step 5:
While the first coat on the back dries, on the FRONT use the Black Gloss Enamels and a combination of a foam brush and thinner brush to paint the silhouette and inside of the tree black.
I used a 1" foam brush to create the larger base of the tree. Using fluid vertical and curved strokes I filled in the lines of the silhouette. Then I came back and used the smaller brush to fill in specific areas and to add smaller branches and offshoots. This method left lines visible in the tree silhouette, but that was my purpose. (You can easily remove any visible Sharpie lines after the paint dries)
Step 6:
Use the smaller tipped brush and add smaller branches and twigs to the large tree outline. Let dry.
Step 7:
Flip the window back over and do a second coat of the Silver Gloss Enamels on the back. This is not an opaque covering...it is meant to be light and semi transparent.
Step 8:
Flip the window back over and double check the tree silhouette, add or touch up the tree if necessary. Let dry.
NOTE:Normally you would bake the Gloss Enamels, but it is a bit hard to get a window in the oven! The Gloss Enamels will air cure in 48 hours.
Step 9:
Repeat the process for the second window. You can use the same tree silhouette or a new one. I designed this so that if you flipped both windows to be more vertical, they would look like trees, and if one is horizontal and one vertical, it looks like a tree and a branch.
Step 10:
On the front, place the Martha Stewart Crows Silhouettes where you like.
Additional Mantel Elements
I finished off the mantel with the following (more tutorials to follow) elements. Again I shopped as Jo-Ann Fabric and Craft Stores.
Wrapped Candles
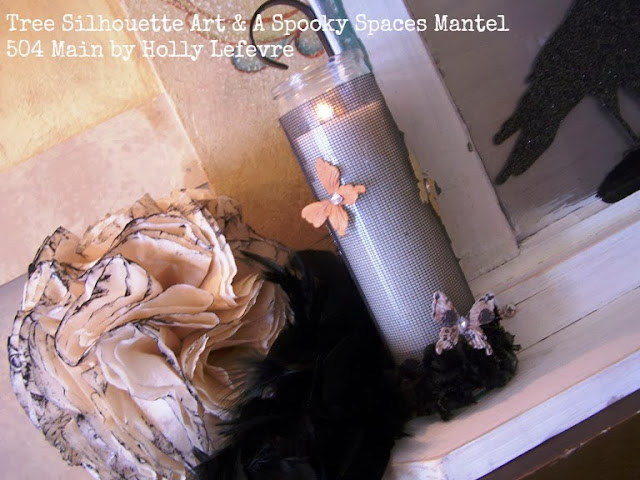
Candles wrapped in my secret weapon (ha!) and trimmed with organza rose trim and Engraver Butterflies (Mulberry Paper with accent). One black feather boa was used as-is...exactly as I purchased it from Jo-Ann, draped across the mantel to act as a unifying element.
Coffee Filter Pom Pom Balls
Coffee dyed coffee filters attached to Styrofoam balls, and accented with Distress Ink edges and Engraver Butterflies (Mulberry Paper with accent).
Tattooed Pumpkins
Mini white pumpkins tattooed with poison labels (tutorials HERE or HERE)
And...here is a smaller version done on a picture frame.
See there are options if you cannot find an old window!
And one last look at the final mantel...
I love having my coffee here in the morning and enjoying my mantel design!
You can find out all sorts of inspiration in the Creativity Made Simple part of their website.
If you are looking for more #spookyspaces inspiration
be sure to visit Jo-Ann Celebrate the Season
Oh and lookie, lookie! Here is a 50% coupon for you!
Have you finished decorating for Halloween?


Everything looks amazing on the coffee shop's mantel. What a great idea to share your decorating talents there! That tree window is just perfect.
ReplyDeleteThat looks amazing! And I love that you did it at the coffee shop!
ReplyDeleteThe really cool friend (you know who you are) gave me the perfect window for this! I am so doing it!
ReplyDeleteThis is awesome Holly. I love your tree!
ReplyDeleteI would love you to check out my website,and give me some feedback!
ReplyDeleteTree Services in Birmingham AL