When I was younger and we would go to dinner I would always ask my mom if I could get "mashed potatoes, hash browns and french fries," - and only that...YUM! (By the way, she always said no.) But I am an adult now. I could order that if I wanted too...but alas I try to stick to one kind of potato per meal. Now, however, I have learned how to cook my potatoes in different ways and to create healthier versions of my favorites...hence these delicious Oven baked (No Oil) Potato Wedges. And guess what...everyone in the family gives them a thumbs up!
Showing posts with label cook. Show all posts
Showing posts with label cook. Show all posts
Tuesday, January 10, 2017
I have a big sweet tooth, but my real weakness is salty pickled anything. I love pickles, pickled eggs, pickled cauliflower, pickled carrots - you name it. Now I am making my own pickled jalapenos - because why not pickle everything. Well, really because I love them as they are, in salads, on tacos - they are simply delicious!
Wednesday, October 21, 2015
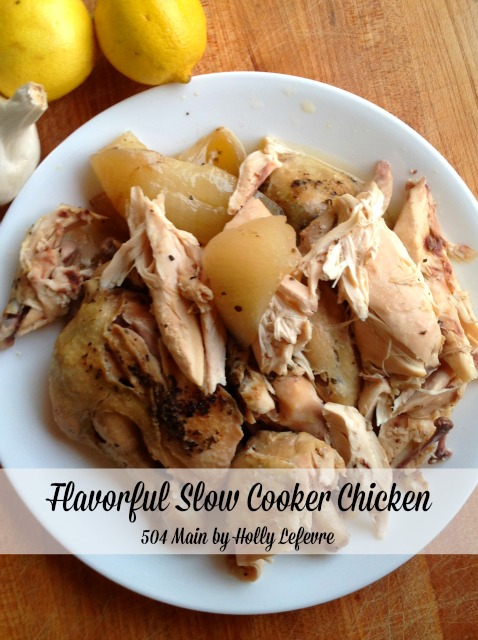
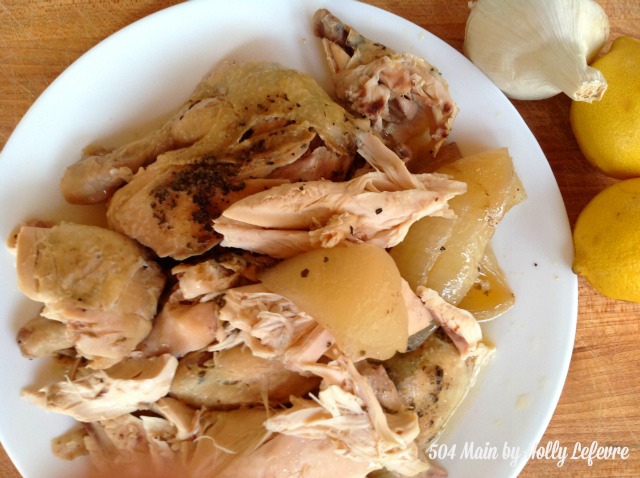
Let's get something straight...I love to bake - I have always been a good baker. Cooking, on the other hand...well, it has not come naturally...and my family is P-I-C-K-Y. I find myself making the same things over and over and they get bored and I get frustrated...BUT I do have a few tricks up my sleeve and this Flavorful Slow Cooker Chicken is one of them!
I am not a big meat-eater (which is like a sin in Texas) but my family, especially my husband needs his meat for every meal. I continue to test and try different recipes to find combinations of flavors that he (and the kiddos like)...and this super flavorful slow cooker chicken is a "winner, winner, chicken dinner!"
Ingredients
Make it!
I make this chicken all the time and it works so well with our busy schedules. We use it in salads, serve it with rice and pasta, and in chicken tacos! Whew! Everyone is happy!
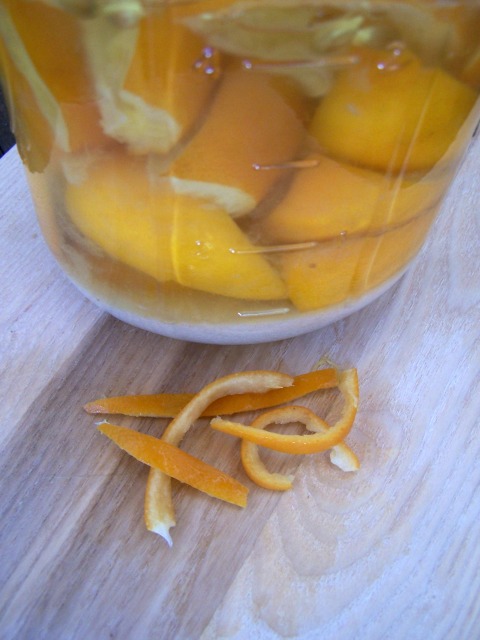
You can also play around with the spice combinations - add more or your favorite...and it is amazing when some preserved lemons - they add a richness to the dish.

This post is written and created at 504 Main by Holly Lefevre
I am not a big meat-eater (which is like a sin in Texas) but my family, especially my husband needs his meat for every meal. I continue to test and try different recipes to find combinations of flavors that he (and the kiddos like)...and this super flavorful slow cooker chicken is a "winner, winner, chicken dinner!"
Ingredients
- 1 Whole chicken, with all the stuff inside removed, rinsed and patted dry
- 2 Tablespoons softened butter
- 1 teaspoon black pepper
- 1 teaspoon salt
- 1 teaspoon garlic powder
- 1 teaspoon Mexican oregano (ow regular oregano)
- 1 teaspoon cumin
- 1/2 teaspoon chili powder
- 1 cup organic low sodium chicken broth
- 1/2 white onion, sliced (Optional)
Make it!
- Mix the softened butter with all of the spices, salt and pepper. Mix thoroughly.
- Remove the insides of the chicken, rinse it and pat dry
- Breast side up, gently use your fingers to separate the skin from the meat.
- Use your fingers to place the butter mixture between the skin and meat all over the breast and into the wings and drumsticks (as best you can).
- Place 1 cup chicken broth into the slow cooker.
- Turn slow cooker on "low."
- Place chicken in slow cooker, breast side up.
- Add the onion to the slow cooker.
- Cook for 4-5 hours.
I make this chicken all the time and it works so well with our busy schedules. We use it in salads, serve it with rice and pasta, and in chicken tacos! Whew! Everyone is happy!
You can also play around with the spice combinations - add more or your favorite...and it is amazing when some preserved lemons - they add a richness to the dish.
Now go grab and chicken and make dinner tomorrow easy peasy!
Wednesday, February 26, 2014
My family has a sweet tooth.
I don't always want to make a huge batch of cookies, cake, whatever...
because I will eat them...ALL!
I am also trying to healthy up our kitchen (I am always doing that)...
so the other day me son was asking for a treat...
and I decided to try this out...and he loved it (and so do I)...
so naturally I want to share our new recipe for Quick Apple Crisp in a Mug!
Wednesday, January 22, 2014
My family has a cereal obsession - for real! Heck, even when it was just hubby and I there was a lot of cereal in the house. I use cereal in cookies, in cobblers, and I love making new cereal bar creations (like my Honey Nut Cheerios Peanut Butter Bars!). Here is my latest creation...
Cornflake Berry Granola Cereal Bars
Sunday, November 17, 2013
I am a member of the Collective Bias® Social Fabric® Community. This shop has been compensated as part of a social shopper insights study for Collective Bias and their client
I have a confession...I have never on-my-own cooked a turkey.
I always leave it to my hubby.
I always leave it to my hubby.
Well that all changed this week when I headed out to Save Mart Supermarket
to shop their BOGO deal. My kids and I are always on the go and
the mix-and-match meat sale allowed me to grab a great deal on some of
their favorite meal "must haves." Better yet, these cuts of meat were hearty...
so they allowed me to cook up a meal, have some left overs...
and to whip up a batch of tamales.
My kiddos go crazy for tamales!
They have been asking and asking for me to make some, and this presented the perfect opportunity for me to try one of my unique tamale concoctions - I just love trying unusual, non-traditional ingredients in my tamales. So, I figured...it is almost Thanksgiving...
how about some Turkey Cranberry Tamales - oh yeah...yummy!
Now...for your purists...this is my version of a tamale,not necessarily a traditional tamale...but we LOVE it! And so do the guests I serve them too!
Every time I tell people I make tamales they look at my like I am crazy.
I had always heard how time consuming tamales were,
but I really don't have that feeling when I make them...so go for it!
Wednesday, October 9, 2013
I really try to not talk about "the holidays" this early,
but last year I made homemade vanilla extract and it was a huge hit.
Thing is, you gotta make it now!
Those vanilla beans need to flavor that vodka for weeks and weeks.
So I will break my rule and share this one super easy
and much appreciated DIY Holiday Gift now!
I go through Pure Vanilla Extract by the gallons..or so it seems.
I put it in everything...pancake batter, waffle batter, coffee, oatmeal- you name it!
It is a pricey little habit...and I had no idea until about one year ago that you could make it yourself! DREAM ON! This is the best Vanilla Extract EVER (and you can make it for a GREAT price)
but last year I made homemade vanilla extract and it was a huge hit.
Thing is, you gotta make it now!
Those vanilla beans need to flavor that vodka for weeks and weeks.
So I will break my rule and share this one super easy
and much appreciated DIY Holiday Gift now!
 |
| Vanilla Apothecary Label from The Graphics Fairy |
I put it in everything...pancake batter, waffle batter, coffee, oatmeal- you name it!
It is a pricey little habit...and I had no idea until about one year ago that you could make it yourself! DREAM ON! This is the best Vanilla Extract EVER (and you can make it for a GREAT price)
Monday, August 5, 2013
One day my Father in Law came to visit.
I started making dessert and pulled out a 20 year old little hand mixer.
He was silent...and a few months later he sent me a shiny new
KitchenAid Mixer for my birthday.
I had no idea what I was missing out on...
L-O-V-E that mixer....
and here is your chance to WIN
not only a KitchenAid Mixer...but an Ice Cream Maker too!
not only a KitchenAid Mixer...but an Ice Cream Maker too!
Step 2: Follow all the bloggers listed below on Pinterest.
Step 3: Enter using the Rafflecopter widget below.
For additional entries,
follow some awesome new blogs on Facebook!
Wednesday, July 31, 2013
I eat a lot of salad.
I like a lot of different textures and my flavors in my salads
and am always experimenting.
One salad topper that I have used for years and years (and years)
is so simple and adds a nice crunch.
Did I mention...it is super EASY!
- Wonton wrappers (there are a million in a package - or so it seems...I used 1/2 package for this batch)
- Knife
- 1 tsp. Salt
- 1/2 Tsp. Pepper
- (You can also switch out seasonings for different flavors!
- 1 teaspoon (half of the package) - 1 tablespoon (whole package) Olive Oil
- (TIPS: You can also substitute other oils like sesame, grapeseed, etc.)
Tools
Knife
Cutting Board
Cookie sheet
Foil or parchment paper
Oven
Bowl
Make It!
- Preheat oven to 375F
- Stack a few wrappers at a time on the cutting board
- Slice the wrappers (through all layers) into 1/8"-1/4" strips (you can make them smaller too)
- Place in a large bowl and toss with Olive Oil, salt and pepper.
- Place in a single layer on a cookie sheet (as you can see in the photo, I did not lay mine out perfectly but did my best to keep them not to bunched up) and bake for 10 minutes, checking and maybe flipping with a spatula halfway through.
- Let cool
Top your salad with this crunchy goodness...
Or eat them as a snack like my girlie did! I had to hide them!
What is your favorite salad topping?
Monday, May 13, 2013
I like to play with food...
sometimes I get lucky and get paid to play with food
like in this sponsored post from Collective Bias
where I used Kraft Fresh Take to create a simple recipe for an
Easy Eggplant Polenta Stack.
You know how you can sometimes get into a meal time rut?
Yep, I have been in one.
Seriously the kids are asking...every night, "That again?"
Between baseball and gymnastics, and homework, and life...and year end school activities...life is way crazy!
(Click on READ MORE for the yummy recipe! )
(Click on READ MORE for the yummy recipe! )
Friday, May 3, 2013
This post is about birthdays.
It is about cupcakes...really good cupcakes.
The recipe is really easy.
Trust me...don't skip it!
Monday, April 8, 2013
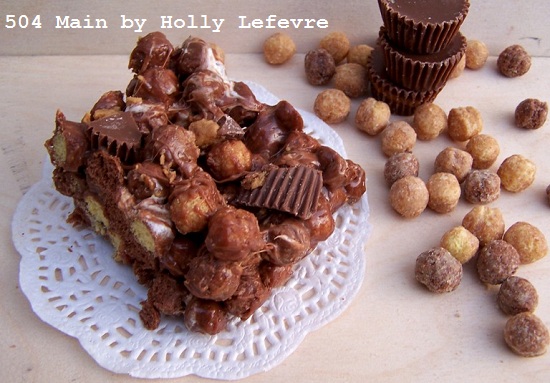
I innocently bought my kids Reese's Puffs cereal
and their sweet little imaginations dreamed up this
purely delicious chocolatey peanut buttery extravaganza!
I am convinced they are trying to torturing me this week
(in a good way..kind of) -
I am doing a Spring Detox/Cleanse
(more about that next week)!
They claim they wanted to create a special treat
for when Grandma and Grandpa come to visit
(Grandpa might just love his Reese's!)
What ever the case...these are delicious...
yes detox and all I had to try them!
Labels:
cereal,
cereal bars,
cook,
dessert,
recipe,
Reese's,
Reese's Puffs,
sweet
Monday, April 1, 2013
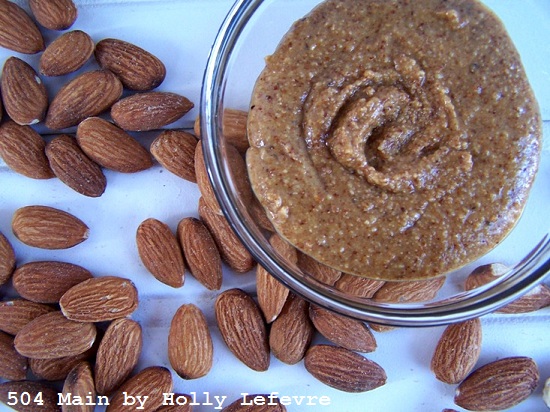
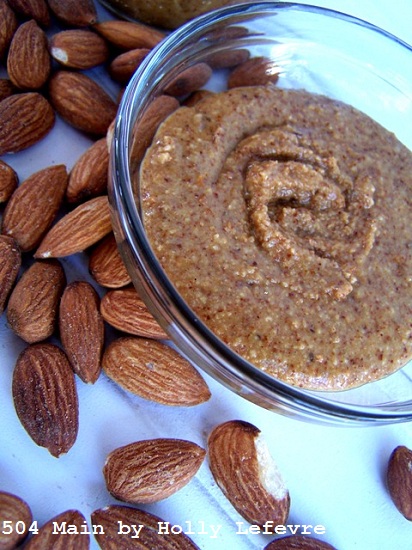
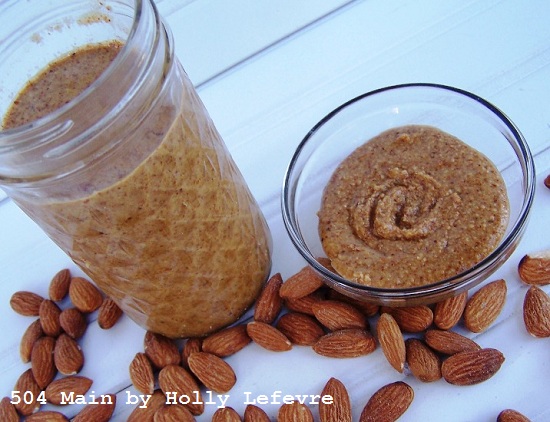
We eat Almond Butter like no one's business in this house.
I have long been intrigued by how it is made...
and recently discovered...it is pretty darn simple!
Well...I had to try it.
The price of Almond Butter keeps going up and up at the store.
Well, for that matter, raw almonds are not cheap either!
(so I am looking for a good bulk almond seller!
If you know a source that you would care to share...I'd love ya forever!)
If you know a source that you would care to share...I'd love ya forever!)
But...I love to make things myself...
so I grabbed a bag of almonds and went to it!
Seriously, it was stupid easy to do....
I have no idea why I researched it so much and procrastinated!
MAKE YOUR OWN ALMOND BUTTER
yield about 1 1/2 cups
time: 10-15 minutes for roasting, 10 minutes for processing
SUPPLIES
- Food Processor or High Power Blender. I have a Vitamix but chose to use my food processor.
- 1 pound raw almonds - shelled, skin on (you can buy roasted ones if you want to skip a step - see below)
- 1-2 Tablespoons of Olive Oil - optional
MAKE IT!
- Preheat oven to 375F.
- Spread almonds on a rimmed cookie sheet (mine has no rim...I was just careful. The rim just keeps them from falling off)
- Roast the almonds for about 10 minutes - then check them. You may need to add a few minutes. BUT BE CAREFUL - do not burn them - check often!
- Remove from the oven and let cool.
- Once cool, put almonds in the food processor (with the regular blade attached) and turn it on.
- It quickly turns to almond meal.
- After about 4 minutes (in my 17 year old food processor), I started to see the beginnings of almond butter.
- I gave it a few more minutes and well, it seemed the almonds did not have enough oil...and maybe needed some help.
- I added 1 Tablespoon of olive oil and ran the food processor for about 2 minutes. Then I added about 1/2 Tablespoon more...and that was plenty.
- Scrape down the sides and bottom, if necessary, and run again
- I sort of got excited and lost track of time, but I would say it took no more than about 8-10 minute to get the almond butter consistency I was looking for.
My hubby likes chunky almond butter but I used all the almonds!
To make it chunky, roast some additional almonds...
chop them up...and throw them in there at the end!
To make it chunky, roast some additional almonds...
chop them up...and throw them in there at the end!
Transfer the almond butter to a glass jar or air tight container and store in the refrigerator.
Now I cannot wait to try some new flavors!
Now I cannot wait to try some new flavors!
I have been researching this for a long time all over the internet...here are a few other sources (with pretty much the same recipe) but they have some tips!
(She shows the grinding process step by step and minute by minute
Have you ever tried to make your own nut butter?
And, I have to ask...do you know of a good bulk almond seller?
Tuesday, March 19, 2013
I seriously love hummus.
I have long made my own hummus
I can control the balance of flavors to my liking
(although I do head to Trader Joe's to grab their hummus in a pinch!).
Recently I have decided to play with flavors even more,
and my first creations is...
Spicy Carrot Hummus
Many, many months ago I saw a recipe for Spiced Carrot Hummus with Garlic Oil on Daily Bites Blog. I printed it out, made it, and fell in love. I have made it many many times since then to rave reviews. Trust me..it is good. But I wanted me own variation, my own twist..
so here it is...
INGREDIENTS
1 pound carrots
1 can chickpeas, drained and rinsed
3 Tablespoons Tahini
3 Tablespoons Olive Oil
2 Tablespoon Fresh Lemon Juice
3-4 cloves of garlic, minced (you can always add more if you like garlic!)
2 teaspoon chili powder
1 teaspoon dry ground mustard seed
1 teaspoon ground cumin
1/2 teaspoon red cayenne pepper
Special Equipment:
Food processor or good (high horsepower) blender
MAKE IT
- Steam the carrot for 20-25 minutes. They need to be steamed past fork tender to blend easier. I left the peels on and just chopped the top of the carrot off. You can peel them if you would like.
- Drain and rinse the chickpeas.
- Place the chickpeas, tahini, lemon juice, olive oil, garlic, chili powder, dry mustard, cayenne pepper, and cumin in the food processor/blender and blend until thoroughly combined and smooth.
- When carrots are done cooking, add them to the mixture in the food processor/blender
- NOTE/TIP: Reserve some of the cooking liquid in case the mixture gets too thick and some liquid needs to be added to the mixture. You can also use small amounts of olive oil as well.
- NOTE: If you want it spicier, you can adjust the spices to your liking. Also...be sure to head to Daily Bites - hers has curry in it for a different flavor profile
This is amazing served with so many different things.
I often served mine with pita chips or lentil chips,
but for a lo-cal options try celery or red pepper.
Labels:
appetizers,
beans,
carrot,
cook,
dip,
hummus,
recipe,
vegetarian
Subscribe to:
Posts (Atom)


