504 Main by Holly Lefevre
twitter facebook instagram bloglovin google plus pinterest youtube

Monday, September 19, 2011

I planned and prepared for my
"Girls Night In" Parisian Extravaganza
and viewing of

Bridesmaids
and finally it was here!
A little warning...this post is not as "PG" as I usual am here.
This is 504 Main Unrated. OK, not that bad!
This movie I had heard so much about was finally in my hands...
in my house and I was ready to watch it on our new TV
(before it was available in the stores)!!!
But just so ya know, it can be yours tomorrow!
Bridesmaids is available on DVD, Blu-Ray Combo pack or as a digital download on 9/20/11, so you can all snatch up a copy and have your own Girls Night In!
 (A gorgeous flower arrangement from my friend Jaime)

I shared about my party prep on Thursday...
You can check out the detailed menu and the ideas there!
BUT as any good planner knows sometimes you must roll with the punches...my day did not quite go as planned (I had a mild case of food poisoning - which after seeing the movie is WAY TOO appropriate...but I swear mine was not even close to theirs - and that is an image that will be burned in my mind forever!), so I had to tweak the menu, and not every teeny-tiny detail was attended to..but I wanted to have FUN more than stress out over rosettes on champagne flutes. And these lovely ladies showered me with more hors d'oeuvres, wine, and fanciful gifts! Who knew! I love these ladies
(and not just because of the gifts)!
(A hand painted card from Kelly and pink sugar to rim the cocktail from Rook No. 17)

We ended up having a wonderful selection of food and beverages, and I tested out my lackluster bar tending skills making Pomegranate Champagne Cocktails. I tried channeling Tom Cruise in Cocktail for this portion of the evening...
but was more little tipsy sorority girl and I was not either tipsy or a sorority girl.
Anyway...they tasted amazing...and were delicious and a perfectly bridal beverage!
 The menu included brie, pickled veggies, pastry puffs, edamame dip, grapes,
and drunken melon balls
(which going with the spirit of the evening we just call "drunken balls")
I went with a modified Parisian theme in honor of the bridal shower
(and I did not send anyone to Paris to research)

The swag for each lady was a pink Eiffel Tower bank, my FAVE lip gloss, and a candle.
I decided to skip the puppy.

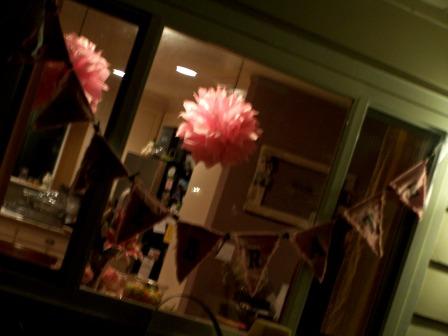
Here is a glimpse of the decor.
I was so busy that my photos are lackluster.
It was so much easier to plan an event when I had professional photographers and a staff!
I tinted mason jars pink and selected bunches of carnations for them.
I think carnations have a bad rap and in clusters they look pretty!
 The dessert table
(oops no dessert on the table...but you get the picture)
Treat tower: truffles (not the ones I made!), chocolates, and licorice!

After an hour or more of chatting and enjoying a cocktail or three we headed down to the family room to watch the movie...woo-whoo! I was very happy that after 15 years we finally upgraded the ole TV...and so was everyone else...what better way to watch this hilarious movie than on a new TV (except maybe the dress selection/trying on scene).
I served dessert during the movie:
Crack Pie
Lemon tart
Cheesecake
I tried to make this seemingly delicious chocolate truffles...
My husband tested them and after spitting them in the trash said
"I never thought chocolate, sugar, and almonds could taste so bad."
I totally burned this recipe.

(I totally need a media room makeover now!)

While this movie is over the top funny...it also has some pretty raunchy humor...so I made sure everyone who was coming knew this was definitely an adult movie and that I had the Unrated version...just did not want any surprises!

But all of us ladies were up for the laughs that came our way,
from the silly to the sexy to the cringe-worthy to the
almost-hard-to-watch-but-you-cannot-look-away.
The laughter was continuous and contagious.
A little something for everyone.

We all LOVED the movie and hanging out with the ladies.
Here's a quick "Ode to Bridesmaids"
Thanks to Bridesmaids...
I have a renewed love for giant cookies...
I should have served a ginormous sandwich at the party...
I just might serve a ginormous sandwich at my next gathering...
(I will never look at a sandwich the same again)
I will NOT eat at a-hole-in-the-wall restaurant, especially if it is Brazilian...
Puppies are not good gifts...
Jason Bateman is hot...
Remember to like the nice guy, not f*** the bad guy in the Porsche.
I am glad I am not dating...
I am glad I am not a bridesmaid...
I did however, remember some of the fond memories of being a bridesmaid...
I want to plan another wedding (to the same guy)...
I want a Parisian Bridal Shower (or birthday party)
I am still singing "Hold On" by Wilson Phillips!
(so breaking out the old CD's)
***************
Did you see the movie?
What was your favorite part?
Are you picking up the movie?

Link up  and share your wedding/bridesmaids related story below.
Links back appreciated but not required...this is just for fun!
Everyone LOVES a good wedding story!
You know you have one!
Signature 
Sponsored post. See my disclosure HERE.
Bridesmaids and Wedding Delights and Don'ts!
Share your story, any wedding-related story. Links back appreciated but not required...this is just for fun!
 photo arrow.pngCONTINUE READING


I was a wedding planner in Los Angeles for years. I loved it. I quickly caught on to the do's and don't of selecting my clients, and can honestly say after all the years spent walking people down the aisle, I had some awesome clients, families and wedding parties (really, I am not lying!)!

I could go on and on about stories - silly, ridiculous, just the stuff that comes along when you involve families, money, and emotions...but today, in honor of my Girls Night In with Bridesmaids I am sticking to bridesmaids stories - just a few tidbits here and there.

I was a bridesmaid many times. I probably was not the best bridesmaid, but not the worst. My biggest flaw (unless my friends come and chime in here and really tell the truth) was that I was over eager. I was not a wedding planner yet, but wanted to be and thought I knew way more than I did.
***************
My own personal stories are actually pleasant...except a brief period in one friends wedding.

My Own Personal Helen
I had a Helen in my life. She was the Maid pf Honor and lived out of town. The rest of us thought we were working together to throw a shower...until I received a message on my answering machine (and I paraphrase, but the intent and effect is the same)
"Hi, this is XXXXXXX. I just want to let you know that I do not think you can throw a shower worthy of the bride. Not the kind of shower she deserves and expects. So, I will be planning the shower alone."
Really...and who are you?
the end (to protect the innocent...I will stop here)
***************
As a wedding planner, I worked on one particular wedding were the bride and her maids were very young and just did not get anything about schedules or timing or having a good attitude. Here is the story:

Massages and Quickies
This wedding is one for the record books…If there could be a problem related to the attitude of the bride or the bridesmaids…or groomsmen this was it.

The day began with a call from the makeup and hair design team, asking me where the ladies were. “In the hotel room,” I tell them. “No they are not.” After getting a hold of the bride she informs me that she has sent the ladies down to have massages, because she felt like it. OK! YIKES!

Once the bridesmaids were all tracked down, they were indignant that they would have to postpone or miss their massage…apparently this day is all about them. To top it off they were very young and really had no clue what they should be doing or how to behave as an adult or as a responsible bridesmaid. I clearly remember lots of shrieking, mothers complaining, and chaos.

Fast forward to the wedding reception and preparing for the Grand Entrance. Now mind you, this is a bridal party of 15 ladies, and 15 men. Corralling them and lining them up is a feat all in its own self. After much tracking down and running around, I think I have it.

I turn my back, and when I turn back around, a pair is gone…where to…I do not know. I send an assistant to find them…she tracks them down coming out of the elevator. We get them lined up, and another pair is gone. This happened 4 times. Where were they going…upstairs for a quickie.
**************
Now, we move on to some serious Bridesmaids business! I recently authored the book  The Everything Bridesmaid Book: From bachelorette party planning to wedding ceremony etiquette - all you need for an unforgettable wedding (Everything Series) and in it shared some bits of wisdom I learned over the years. Being a bridesmaid can be fun, and truly define (and make or break a relationship), but what is important it to remember to take the task seriously and remember it is for the bride. 
Here are TEN do's for being a bridesmaid
(reprinted from the book)

How To Be A Better Bridesmaid
1. Listen…really listen. Some days the bride may just need to talk to someone to think things out. An open ear and a good friend are priceless.

2. Be calm. Even in the most stressful moments, keep your head about you. Calm is contagious.

3. Make her take a break. Steal away with your friend for a simple cup of coffee - no wedding talk allowed.
4. Approve of her choices. This is not your wedding. Let the bride have her way on her day. If she asks for an honest opinion, it is OK to give it, just do it nicely.

5. Let the bride speak first. Nothing is worse than listening to a bridesmaid go off on a tangent about the “ugly” flowers…when the bride thinks they are fabulous.

6. Plan a bridal shower and a bachelorette party that pays homage to the bride’s style, taste, and personality. 

7. Don’t compare. A laundry list of what you did better or how your friend did this or that will not make for good girl chat.

8. Be agreeable. Nothing ever good has come from a disagreeable bridesmaid.

9. Participate. You may despise the bouquet toss or wouldn’t want to be caught dead line dancing, but if that is part of the festivities, get out there!

10. Behave. Dirty dancing with the groom’s brother, passing out in the hall, telling the slacker bridesmaid off – not a good idea…for obvious reasons.

What's Your best advice or crazy story!
Link it up on my Girls Night In Bridesmaids Post!
Go HERE to link up!

Signature

 photo arrow.pngCONTINUE READING


Sunday, September 18, 2011

I have commitment issues with furniture,
but once I make a commitment, it is for life!

I have wanted an ottoman forever...
what held me back...who knows?
I mean it is crazy...it is not a huge investment,
I like the way it looks, hubby likes the way they look...
but still, I did not purchase one...
seriously this has been going on for years.
Fast forward....to January, when I was in Los Angeles for the Craft and Hobby Association Show I saw a company called The Upholstery Studio, and was so excited! Through their brand Home Decor 1-2-3 - they have kits to make your own headboards, benches, cornice boards...and ottomans! I thought I can totally do that! I am finally going to get my ottoman!

Since then, I have received and built my own ottoman using the complete kit provided by The Upholstery Studio via The DIY Club.

 Three other DIY Club ladies also made ottomans.
You should check them out they are fabulous! They are also so different and full of personality!
The DIY Showoff: DIY Project Parade and Ottoman Tutorial
Its So Very Cheri: I Made A Utility Cart Ottoman and You Can Too
Whisperwood Cottage: How We Made Our Own Tufted Fur Ottoman...and How You Can, Too!

AND, OVER AT THE DIY CLUB, WE ARE GIVING AWAY ONE OF THESE FAB KITS!!!!

I received two ginormous boxes from The Upholstery Studio (all that batting and foam takes up space), and I will be honest, I was intimidated. What have I done? HOWEVER...I opened the directions, read through them (I really did!) and looked at the pieces and tools, and it all made perfect sense.

The Ottoman Kit comes with detailed directions, and even an instructional video (I just used the written directions). This is my first EVER built from scratch piece of furniture and my first EVER upholstery project. So, if I can do it, you can too!

I am not going to walk you through step by step, but just highlight the major points (all of the directions are in the kit). EDIT: Again, this post is to show you (quickly) the basic steps to make an ottoman and how it is possible even for a first-timer...this is not meant to be a tutorial to make your own.

TOOLS/NECESSITIES
The Ottoman Kit comes with everything you need to build this ottoman from the ground up including upholstery supplies and upholstery tools...except
*I also used a drill for the screws (I started with a screw driver and have a huge callus to prove it)
*I also used a staple gun
*Sewing machine and thread, scissors, pins...BUT Diane at In My Own Style has a great NO SEW ottoman upholstery tutorials
*Fabric. I was having issues committing to a fabric...and the selection where I live is pretty dismal...and I like to feel a fabric before I use it, so mail/online ordering was out for me on this project. BUT finally, I made a decision. Now I know this is not original, but I used drop cloth. HERE'S WHY:
1 -It is Neutral - I want my ottoman to fit in either the living room or family room or even as part of the outdoor room on the deck.
2 - It is durable and easy to clean (kids, enough said)
3 -It is easy to cover with another fabric - a slip cover - without any print, etc. showing through.
4 -My sewing machine is on the fritz and I did not have to sew a hem...just cut my skirt to use the hemmed edge of the cloth as the finished edge!
5 -I like it!

Here's a quick rundown of the process:
Lay out all wood/structure pieces out so I had an idea of what I was aiming for
Marked screws positions, using the template and screwed the frame together according to the directions.

Apply bending board to the sides, using glue and staples.

Add webbing. Using the staples and the webbing stretcher (I have a new love for upholstery tools), I added the webbing to the ottoman top...first horizontally and the wove it vertically. The webbing stretcher is essential - pulls that webbing so tight!
Apply burlap over the webbing and secured into place.

Apply tack strips
Apply 1" foam to the center and then a larger foam on top using 3M Adhesive spray. (that orange "stuff" is the spray!)

Once in place apply Dacron over the top...this smooths the edges of the foam, and gives the ottoman foam a great shape.
***There are options for this step...used the black fabric in my kit. More details are in the ottoman instructions.***

EDIT: So, it looks like a lighter color should have been used in this step...and I think I made a boo-boo in my process (got my fabrics mixed up a bit...BUT the black does not show through the heavier fabric...AND, hey it is my first time, so I am giving myself a pass.

Apply fabric to the top of the ottoman. Determine your style and add tufts or pleats or gathers as you desire (there are specific direction with the kit, but I chose to do my pleats this way as a "style thing"). Sew welt (use could use purchased trim or nailheads, but it was easy to sew). Apply welt to the ottoman using tack strip as guide.

Attach skirt. I chose to pleat my skirt with a certain style as well (the directions call for a 4 piece flap type skirt - which is more tailored).
  • I did a box pleat in the center of each longer side and 3 matching pleats (matching to the top pleats) at each corner.
  • I pinned my skirt first to make sure I liked the look.
  • When applying the fabric, staple at the centers of the ottoman vertically and horizontally first, evenly distributing your fabric (I basically folded mine in half, pinned half (the fold) to one side of the ottoman and the other half (fold) to the opposite side.
  • I did the same thing for the other direction. Then your fabric is basically, evenly distributed all over the ottoman.
  • Once happy with the look, I marked my staple line with a pencil; flipped the skirt; positioned it into the correct place and secured with staples.
(This is a pen mark, just so you can see it - use a pencil, lightly)

Lift skirt (I flipped my ottoman over on a table) and apply batting to the sides of the ottoman using spray adhesive. Apply a layer of Dacron over the batting securing on the underside of the ottoman. EDIT: Dacron is also applied to the underside of the ottoman.

Attach casters - I may add bun feet later, but like the functionality of the casters right now. EDIT: Dacron is also applied to the underside of the ottoman.

Gorgeous!

My kids think it is so cool I built this...and I think my hubby is still amazed I did it without his help!

This is a basic oval ottoman from The Upholstery Studio Ottoman Collection 1.
I really wanted to try the storage ottoman..but I was a chicken....BUT, after completing my first upholstery project, I am confident and ready to go for it! And maybe, who knows...the couch! Now...you want to amaze your friends and family, we are giving away one of these complete kits at THE DIY CLUB!

Have you ever tried upholstery? Any tips?
Go ENTER to win your own Ottoman Kit at The DIY Club
You can win the complete kit and tools to make your own!
Signature
freckled laundryFurniture Feature FridaysDIY Club


Disclosure: Some products have been supplied to me via The DIY Club. See my complete disclosure by clicking "Disclosure" in the Navigation Bar.
 photo arrow.pngCONTINUE READING


blogger template