504 Main by Holly Lefevre: fabric
twitter facebook instagram bloglovin google plus pinterest youtube
Showing posts with label fabric. Show all posts

Saturday, December 3, 2016

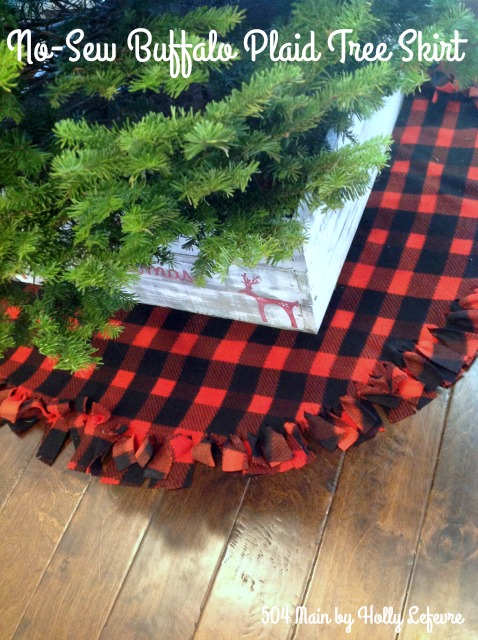
One of the easiest ways to change up the look of a Christmas tree is with a tree skirt. I have used tablecloths, blankets, ruffles, and yards of fabric. This year I wanted a new look...again. When I made my rustic scrap wood ornaments, I was inspired to try a more rough and rustic approach to my Christmas tree skirt and overall look. Well, and I just happen to LOVE buffalo plaid - any plaid actually. I surely wish I still had my double breasted royal blue and black buffalo plaid coat from Contempo Casuals!


A rustic plaid tree skirt if perfect for this years tree


 photo arrow.pngCONTINUE READING


Sunday, May 31, 2015

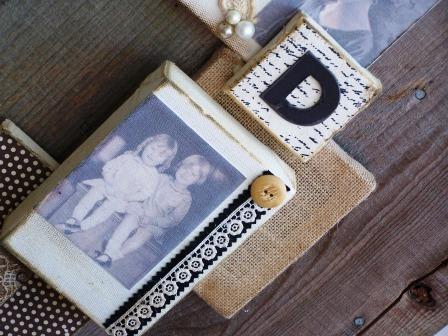
Trying to capture and preserve my family's heritage is very important to me. It is also difficult. The older generation - the ones who remember World War II, The Great Depression, and beyond that, as it pertains to my family are gone and have been for a long while. So, I take what I can get, what I can find along the way, and do my best to honor and celebrate where I came from.

This Family Heirloom Wreath is one of my favorite ways to remember my family.

photos and mementos create a family heirloom

 photo arrow.pngCONTINUE READING


Sunday, November 30, 2014

In spite of my ability to complicate everything, I LOVE simple crafts. In fact, these are so simple that the kids can make them too! I also LOVE that you can use what you have - doilies, ribbon, fabric, denim - whatever suits your own personal style (and is in your craft stash) works so well for these cuties! So, let me introduce you to my little angels.

 photo arrow.pngCONTINUE READING


Wednesday, September 4, 2013

A little bit ago, a lovely little package with a couple yards
of Waverly Fabric from Jo-Ann Fabric and Craft Store  arrived on my doorstep.
This fabric sent me over the moon - gorgeous and fun and fabulous!
I had one million and one ideas for it...
and was only given one rule...Waverize It!  

Slipcovered Ruffle Wreath

 photo arrow.pngCONTINUE READING


Tuesday, March 27, 2012

I love little bunnies.
(in theory anyway)
It is the ears that get me...
big ole floppy ears...too sweet!
And of course their healthy eating habits...
carrot anyone?


I really do not do a lot of holiday crafts,
but one or two per holiday and I am happy.
They are usually pretty simple too...like this one.


I tend to over-complicate matters...
but tried to keep this SIMPLE...
and seeing as how my 4 year old can almost make one on her one...
I think this qualifies as SIMPLE.
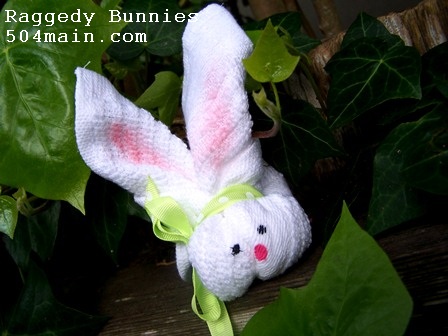
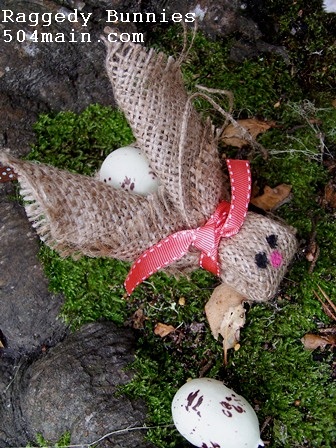
Washcloth turned bunny

My mom made these little bunnies (or something very similar)
out of baby wash cloths for my nieces baby shower 13+ years ago
and they were called boo-boo bunnies
(I think you wet them and freeze them and pull them out when there is a boo-boo)...
so that is my inspiration.
(NOTE: my bunnies are NOT meant to be boo-boo bunnies.
Someone asked...so I am throwing that out there.)

There are so many ways to make this little bunny your own...
so go with it and be creative.
Most importantly...you can ever use what you have!
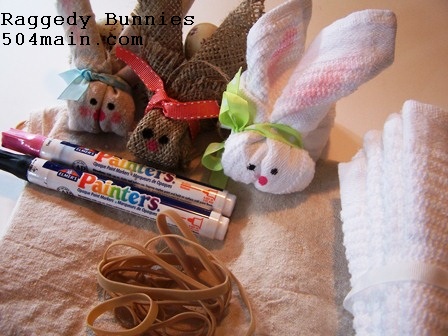
Simple supplies
Supplies
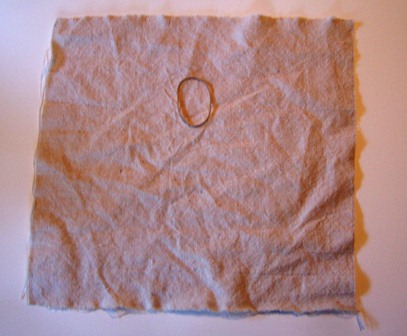
  • Cut/ripped piece of drop cloth (what I used) or burlap or your favorite fabric...or a wash cloth (Target washcloths)
  • Rubber bands - I bought a big bag of assorted rubber bands...the thicker ones that you can wrap a few times work best.
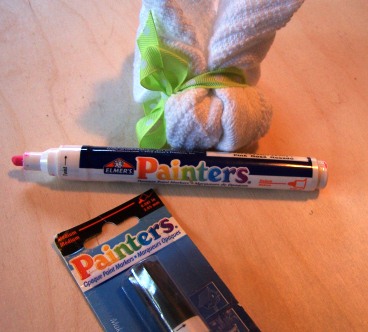
  • For the Face, I used Elmer's Painters in black and pink. These were so easy to use for this!
    • NOTE: You could use regular paint, or embroidery with a few french knots or buttons - your pick.
  • Ribbon/trim
  • Optional: blush and cotton swab


DIY IT!
1. Cut/rip fabric into a 12" x 12" square


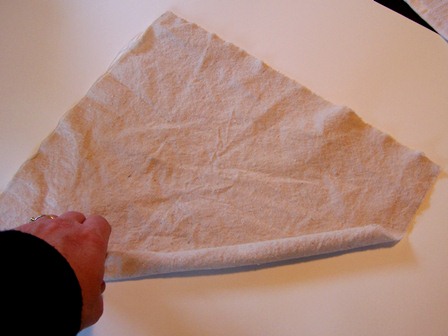
2. Roll diagonally from one corner
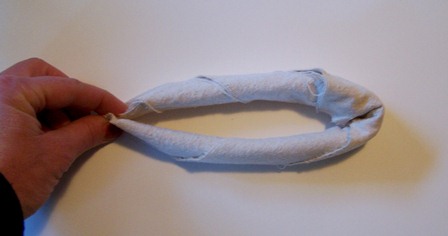
3. Fold in half


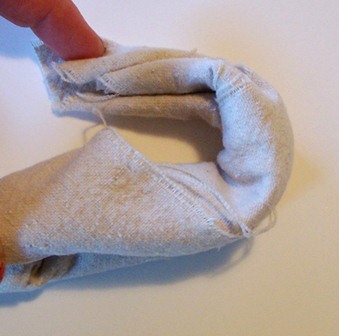
4. Flip so it looks like a U and fold back all the way.

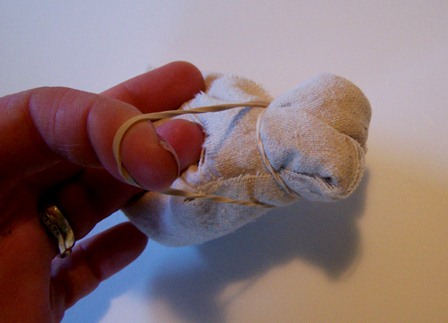
5. Pinch closed. Place rubber band about 1" back from this new fold and wrap rubber band a few times.


5. Make a face, I did 2 simple dots for eyes in black and one in pink for the nose.

6. A smidge of blush on the ears and maybe the cheeks
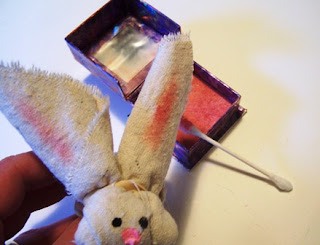
Yes, my bunnies wear Benefit cosmetics!


Voila!
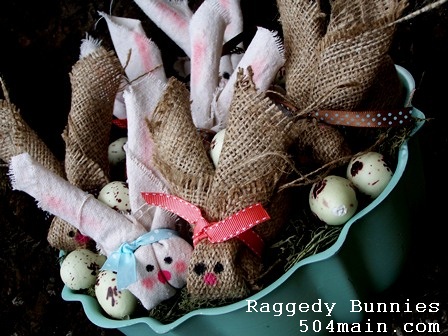
Kissing bunnies

In about 5 minute you have a bunny!
Or lots of bunnies!

Each bunny has a different face!


So, are you up for an easy craft?
Try this one!

Signature


Follow Me on Pinterest
Today's Creative Blogfreckled laundryTip Junkie handmade projectsSkip To My Lou
 photo arrow.pngCONTINUE READING


Monday, December 19, 2011

I am also a little obsessed with trees this year. I had plans to get crazy with little vignettes of trees everywhere...well, it did not happen...yet (Every year I am crafting and creating until the last minute...well, I still have 6 days left...so technically not the last minute, right? I still have time.)

Anyway, I still LOVE my trio of trees from last year, but had to make more trees!! Now these trees are very different than last years trees...
THESE ARE SO EASY TO MAKE.
It took me about 30 minutes to make them all!


SUPPLIES

  • 3 - Styrofoam Crafts 5 7/8" Cones
  • 1 Sheet Canvas Corp Chalk Stock
  • Gorilla Glue Super Glue
  • 1 box floral pins with pearl head (you may or may not use the entire box - I used about 20 per tree)
  • Cotton fabric - I used scraps around the house. You only need about 1/4 yard
  • 6 - Skewers (or 3 - skewers and 3 -  Toothpicks)
  • 3 - Pearls or beads Glue stick


If you can rip and pin/stick things in Styrofoam...
you can do this craft

1. Lay fabric flat and make 1/2″  cuts about every 1/2″ along the selvage of the fabric


2. Rip fabric using the small cuts as the starting points
(There will be lots of strings and frayed edges – and that is good!)

3. At the base of a cone use a floral pin to secure a strip of fabric. Begin wrapping that strip of fabric all around the cone, overlapping edges slightly.


4. When you reach the end of a strip, grab another strip and secure the first strip to the second strip with a fabric pin – just stick in the Styrofoam, being sure to secure the end and beginning of the strips.

5. Continue to wrap until you are finished (I used about 2 strips per cone for wrapping..if you use a larger cons, you will need more strips.) when you reach the top wrap around the top to cover the Styrofoam (you will be placing a toothpick in here so, try to keep a little space open in the center to poke this in). Secure the strip to the top with a pin.


6. You can be done if you want..or I used one more strip – secure to the top with a floral pin (you can secure it using the pin you just inserted to finish off the wrapping). Twist this strip of fabric and then wrap around the tree, like a garland – you are not wrapping to cover just to accent. Finish off the end with a floral pin.

7. Decorate the tree with floral pins – by using the pearl headed pins to secure the fabric, you are also decorating, so just keep doing it.


8. Place a skewer in the bottom center of the cone. You can then place the trees in anything you want. I kept my skewers long and used my milkglass vases to display them. You can grab some floral foam and tuck them into many different types of containers.


Add some FUN with Sweet Little Pennants of JOY!!
I made some pennant ornaments using Canvas Corp paper the other day and these tree  topper pennants were inspired by those.


Now, I made 3 trees and wrote JOY on the pennant,
but these are easily adaptable to any wording and so EASY to finish.

You need:
skewer or toothpick
chalkstock or heavier paper
pearl (with hole) or other embellishment
Gorilla Glue Super Glue
Glue Stick

Place small drops of Gorilla Glue Super Glue on the tip of the skewer and then place pearl/bead on the point (insert the point into the pole).
 

Cut 3 pennant triangles on the fold in chalkstock (I used my decorative edge scissors to cut the edges). My triangles are 2″ wide at the top/fold and 3″ long.

7

Place glue allover the inside of the pennant, place skewer in the fold; press both sides of chalkstock together.


Cut (or I just broke them) the skewers to the desired size, at least a few inches long.


When dry, insert into the top of the cone…I mean tree!


What are you lovin' this holiday season?
Signature
disclosure: some products were received via my affiliation with The DIY Club. See me full disclosure by clicking on disclosure in the top navigation bar
This post is written and created at 504 Main by Holly Lefevre
 photo arrow.pngCONTINUE READING


blogger template