I am never one to back away from a challenge (99% of the time anyway). I was sent a lovely package of Avocados from Mexico...and my first reaction was guacamole (because I could live on it)...but then I thought what else can I create with The Amazing Avocado. So of course, logically I came to the conclusion to make some jewelry. Yep...I said jewelry!
Wednesday, April 3, 2013
Monday, April 1, 2013
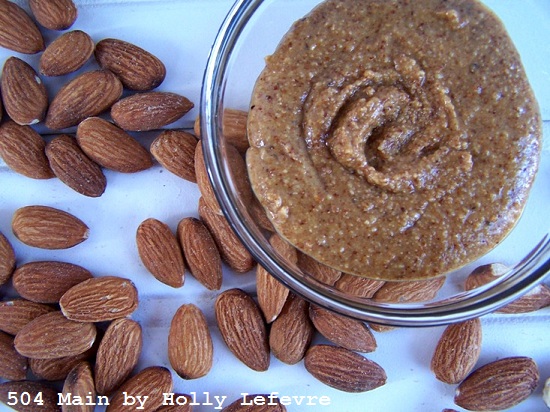
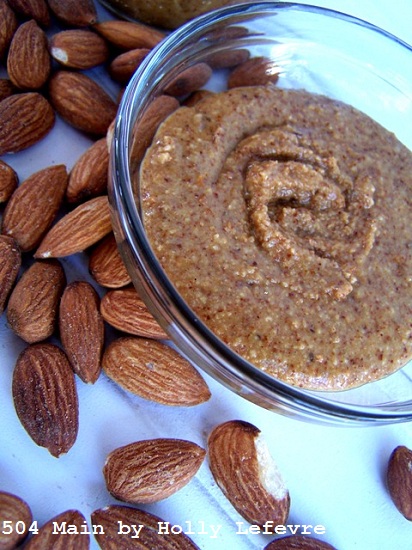
We eat Almond Butter like no one's business in this house.
I have long been intrigued by how it is made...
and recently discovered...it is pretty darn simple!
Well...I had to try it.
The price of Almond Butter keeps going up and up at the store.
Well, for that matter, raw almonds are not cheap either!
(so I am looking for a good bulk almond seller!
If you know a source that you would care to share...I'd love ya forever!)
If you know a source that you would care to share...I'd love ya forever!)
But...I love to make things myself...
so I grabbed a bag of almonds and went to it!
Seriously, it was stupid easy to do....
I have no idea why I researched it so much and procrastinated!
MAKE YOUR OWN ALMOND BUTTER
yield about 1 1/2 cups
time: 10-15 minutes for roasting, 10 minutes for processing
SUPPLIES
- Food Processor or High Power Blender. I have a Vitamix but chose to use my food processor.
- 1 pound raw almonds - shelled, skin on (you can buy roasted ones if you want to skip a step - see below)
- 1-2 Tablespoons of Olive Oil - optional
MAKE IT!
- Preheat oven to 375F.
- Spread almonds on a rimmed cookie sheet (mine has no rim...I was just careful. The rim just keeps them from falling off)
- Roast the almonds for about 10 minutes - then check them. You may need to add a few minutes. BUT BE CAREFUL - do not burn them - check often!
- Remove from the oven and let cool.
- Once cool, put almonds in the food processor (with the regular blade attached) and turn it on.
- It quickly turns to almond meal.
- After about 4 minutes (in my 17 year old food processor), I started to see the beginnings of almond butter.
- I gave it a few more minutes and well, it seemed the almonds did not have enough oil...and maybe needed some help.
- I added 1 Tablespoon of olive oil and ran the food processor for about 2 minutes. Then I added about 1/2 Tablespoon more...and that was plenty.
- Scrape down the sides and bottom, if necessary, and run again
- I sort of got excited and lost track of time, but I would say it took no more than about 8-10 minute to get the almond butter consistency I was looking for.
My hubby likes chunky almond butter but I used all the almonds!
To make it chunky, roast some additional almonds...
chop them up...and throw them in there at the end!
To make it chunky, roast some additional almonds...
chop them up...and throw them in there at the end!
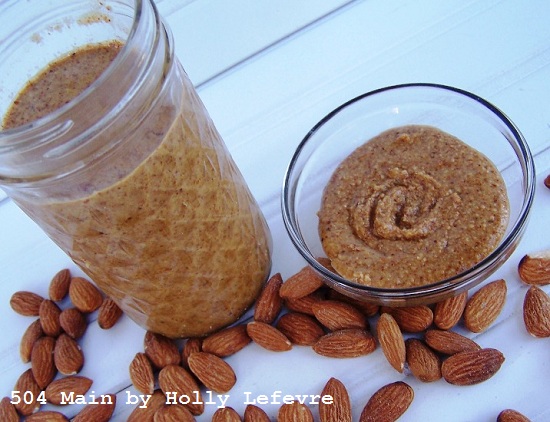
Transfer the almond butter to a glass jar or air tight container and store in the refrigerator.
Now I cannot wait to try some new flavors!
Now I cannot wait to try some new flavors!
I have been researching this for a long time all over the internet...here are a few other sources (with pretty much the same recipe) but they have some tips!
(She shows the grinding process step by step and minute by minute
Have you ever tried to make your own nut butter?
And, I have to ask...do you know of a good bulk almond seller?
Friday, March 29, 2013
Did you see all the amazing handmade jewelry from Spring Bling Week.
I am so blown away by these ladies!
I will take one of each please...oh but wait...
you can enter to win some of these amazing pieces,
including a $50 credit for a Lisa Leonard Design!
I am so blown away by these ladies!
I will take one of each please...oh but wait...
you can enter to win some of these amazing pieces,
including a $50 credit for a Lisa Leonard Design!
But first let's take a look at the beautiful pieces that have been created this week!

__________________________________
NOW the GIVEAWAY DETAILS!
 |
| The winner of prize package #2 will receive a bingo marker spoon pendant - winner can choose any number between #1-98, a pair of beaded wired earrings, a pearl ring and a simple statement necklace. |
 |
| The winner of prize package will receive a bird nest necklace by TLC
Creations, $25 shop credit to Bangle Wood Crafts, and photo bracelet kit
from Photo Jewelry Making. |
 |
The winner of prize package #4 will receive a $50 Shop Credit to Lisa Leonard's Designs
|
Hurry on up and enter to win some great handmade jewelry!
Thursday, March 28, 2013
Welcome to Tickled Pink!
It is time to share your projects, tutorials, crafts, stories,
baked goodies, and foodie creations!
It is time to share your projects, tutorials, crafts, stories,
baked goodies, and foodie creations!
Thanks to everyone who has already contacted me about being a
Tickled Pink Spotlight Selector!
I feel like I have a certain style and certain items/bloggers seem to stand to to me... so how much fun would it be to have a guest every week to feature a few of their faves and spread the love around! And you will get a little promo to your own blog too!
Leave a comment or send me an email if you would like to be a part of this!
(and please bear with me as I work out the final details)
This week I am so happy to have
Gajay from Citruz Designs sharing her picks!
(Head on down to the features to read more about Gajay see her great selections!)
Next week, Tuula from The Thrifty Rebel will be selecting what Tickles Her Pink!
Go on over and say hi!
If you like jewelery
come back tomorrow!
There are 4 amazing giveaways for the jewelry featured at Spring Bling Week!
This week on 504 Main
______________________________________
FEATURED PROJECTS AND INSPIRATION
Now for the features and the Linky!
(click on READ MORE)
Grab a Button here if you were featured!
Thanks again for linking up!
FEATURED PROJECTS AND INSPIRATION
Now for the features and the Linky!
(click on READ MORE)
Grab a Button here if you were featured!
Thanks again for linking up!
Wednesday, March 27, 2013
I love crazy funky jewelry...
and if that jewelry involves something odd -
something not jewelry like - all the better!
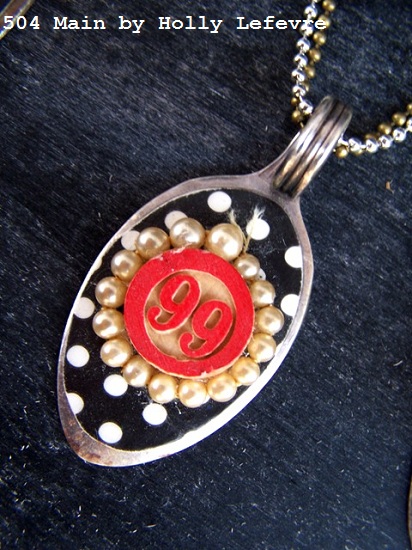
I started making some spoon jewelry about 8 months ago
and LOVE using the flattened spoons as a base for a pendant.
I used to make jewelry all the time...and really enjoyed it.
I am so excited to start doing it again!
I had not shared these beauties because...because I am so behind...
but this week I am participating in Spring Bling Week with some other fun bloggers...
so now is the perfect time to share.
Best yet, you can totally customize this jewelry to suit your style...
I have made some with keys, costume jewelry, fabric, buttons, and gorgeous paper!
Monday, March 25, 2013
When it comes to Easter treats...I need chocolate -
no jelly beans - no malted things - just chocolate
and if it has peanut butter even better!
Surprisingly I have not eaten every single one of these cookies...
I have a weakness - an edible and sentimental one for Reese's.
First, I plain love them!
Second, I know to this day I can go to my parents house
and there will be ice cold Reese's Peanut Butter Cups in the refrigerator.
I am in charge of cookies for the Bunny Brunch coming up at my daughter school...and my daughter had some grand ideas about what she wanted me to make (seriously where do they get these ideas!?)...but instead I made these and she loves them..I love them..we all love them...and they are EASY!
Thursday, March 21, 2013
Welcome to Tickled Pink!
It is time to share your projects, tutorials, crafts, stories,
baked goodies, and foodie creations!
It is time to share your projects, tutorials, crafts, stories,
baked goodies, and foodie creations!
Hey there!
How was your week?
Craziness as usual here!
A little slow on the blog front!
Have you noticed I have been posting more recipes than usual!
Well...time is at a premium and my family needs to eat so food wins over crafts!
I want to try something new...
anyone want to be a
guest feature selector?
I feel like I have a certain style and certain items/bloggers seem to stand to to me...
so how much fun to have a guest to feature a few of their faves
and spread the love around!
And give a little promo to your own blog too!
You need to go through the links and pick 5 of your faves by Wednesday.
Email me or leave a comment if you are interested!
(first come first serve for scheduling)
I made Spicy Carrot Hummus! YUM!
Had a party for my girlfriends and created a Nail Art Tutorial (so easy!)
And here is one of my favorite Bunny crafts from the past!
_______________________________________
FEATURED PROJECTS AND INSPIRATION
Now for the features and the Linky!
(click on READ MORE)
FEATURED PROJECTS AND INSPIRATION
Now for the features and the Linky!
(click on READ MORE)
Tuesday, March 19, 2013
I seriously love hummus.
I have long made my own hummus
I can control the balance of flavors to my liking
(although I do head to Trader Joe's to grab their hummus in a pinch!).
Recently I have decided to play with flavors even more,
and my first creations is...
Spicy Carrot Hummus
Many, many months ago I saw a recipe for Spiced Carrot Hummus with Garlic Oil on Daily Bites Blog. I printed it out, made it, and fell in love. I have made it many many times since then to rave reviews. Trust me..it is good. But I wanted me own variation, my own twist..
so here it is...
INGREDIENTS
1 pound carrots
1 can chickpeas, drained and rinsed
3 Tablespoons Tahini
3 Tablespoons Olive Oil
2 Tablespoon Fresh Lemon Juice
3-4 cloves of garlic, minced (you can always add more if you like garlic!)
2 teaspoon chili powder
1 teaspoon dry ground mustard seed
1 teaspoon ground cumin
1/2 teaspoon red cayenne pepper
Special Equipment:
Food processor or good (high horsepower) blender
MAKE IT
- Steam the carrot for 20-25 minutes. They need to be steamed past fork tender to blend easier. I left the peels on and just chopped the top of the carrot off. You can peel them if you would like.
- Drain and rinse the chickpeas.
- Place the chickpeas, tahini, lemon juice, olive oil, garlic, chili powder, dry mustard, cayenne pepper, and cumin in the food processor/blender and blend until thoroughly combined and smooth.
- When carrots are done cooking, add them to the mixture in the food processor/blender
- NOTE/TIP: Reserve some of the cooking liquid in case the mixture gets too thick and some liquid needs to be added to the mixture. You can also use small amounts of olive oil as well.
- NOTE: If you want it spicier, you can adjust the spices to your liking. Also...be sure to head to Daily Bites - hers has curry in it for a different flavor profile
This is amazing served with so many different things.
I often served mine with pita chips or lentil chips,
but for a lo-cal options try celery or red pepper.
Labels:
appetizers,
beans,
carrot,
cook,
dip,
hummus,
recipe,
vegetarian
Subscribe to:
Posts (Atom)


