In my house we are creatures of habit. So, every year as hearts go up around school and stores, cupid makes his appearance, and everything starts turning pink, my daughter begins to ask for the "Special Valentines Bread." I am always happy to oblige...I mean this pound cake with a surprise heart is so darn cute and always surprises not only the kiddos but adults too!
Showing posts with label food. Show all posts
Showing posts with label food. Show all posts
Thursday, September 3, 2015
I love to entertain and am always looking for ways to make the whole eating-drinking-mingling process easier. I will tell ya, that if my party numbers are small enough I will use "real" (as in not disposable) dishes, but when the party gets larger or has a lot of kiddos or is by the pool, I find these DIY Paper Food Trays come in super handy for serving snacks, chips, and other goodies!
Sunday, August 23, 2015
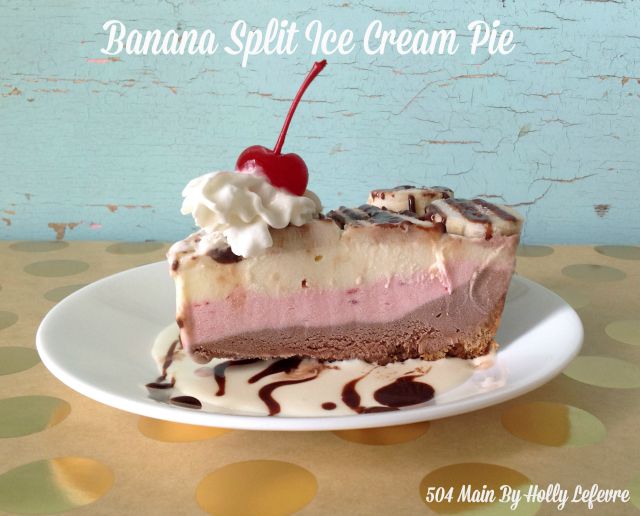
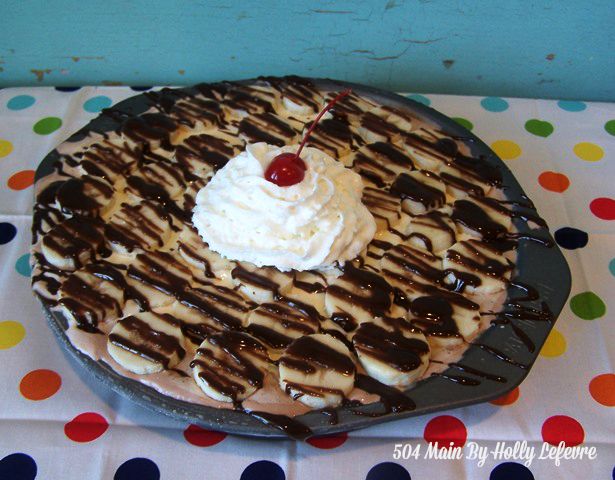
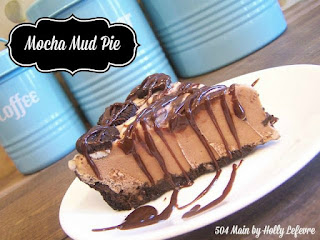
We really love ice cream in this house. I used to exercise only so I could eat ice cream (makes sense, right?). After making Mocha Mud Pie for the family, I felt inspired to make MORE ice cream pies. I have been feeling very traditional and nostalgic, and so what better "old Fashioned" flavors to put into an ice cream pie than a BANANA SPLIT! Chocolate, strawberry, vanilla, banana, hot fudge, whipped cream, cherries - whats not to love!
I did some research on what exactly was in, or on a banana split. I did not know that pineapple and strawberry toppings, along with marshmallow was a part of the traditional banana split! Did you? I took a few modern liberties with my ice cream pie, but it absolutely tastes like a luscious decadent banana split!
NOTE: You have to work quick if you live in a hot area - it is ice cream, after all! Be prepared, have your ingredients ready and your work surface prepped. If I can make this pie in the heat of a Texas summer, you can manage it too!
Ingredients
THE COOKIE CRUST
NOTE: MY daughter said she would like to try Oreo Cookie Crust next time. If you want that recipe head over to the Mocha Mud Pie I posted the other day
Once the pie crust is cooled...

NOTE: It was SUPER HOT the day I made this. I did return the pie to the freezer for about 30 minutes to firm up - it makes it much prettier and easier to cut.

This post is written and created at 504 Main by Holly Lefevre
I did some research on what exactly was in, or on a banana split. I did not know that pineapple and strawberry toppings, along with marshmallow was a part of the traditional banana split! Did you? I took a few modern liberties with my ice cream pie, but it absolutely tastes like a luscious decadent banana split!
NOTE: You have to work quick if you live in a hot area - it is ice cream, after all! Be prepared, have your ingredients ready and your work surface prepped. If I can make this pie in the heat of a Texas summer, you can manage it too!
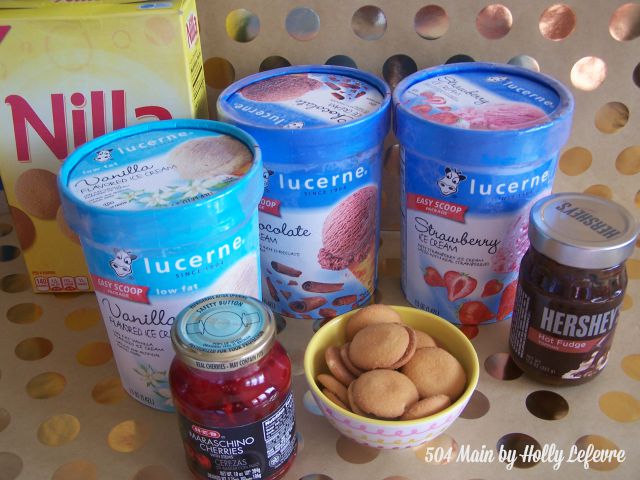
Ingredients
- 4 cups Vanilla ice cream
- 4 cups chocolate ice cream
- 4 cups Strawberry ice cream
- 1 Package Vanilla Wafers
- 5 Tablespoons butter, melted
- 1/2 cup (or less..or more!) Hot Fudge Sauce
- 3 medium bananas, sliced
- Whipped Cream
- Maraschino cherries
- Marshmallow topping
- Optional
- 1/2 cup toasted sliced almonds
- Mini Vanilla Wafers
- Pineapple (sundae) sauce
- Strawberry (sundae) sauce
- Food Processor
- Wood spoon, spatula
- Pie Tins or cake round (I used the 9" round cake pans in the Cake Boss 5-Piece Bakeware Set )
- Mixing Bowls
- Knife
- Optional: Ziploc bag (with tip cut off) - similar to a DIY piping bag.
THE COOKIE CRUST
NOTE: MY daughter said she would like to try Oreo Cookie Crust next time. If you want that recipe head over to the Mocha Mud Pie I posted the other day
- Preheat oven to 350F
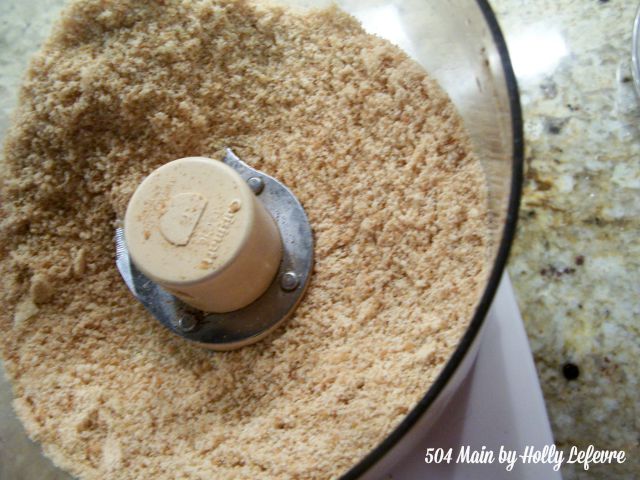
- Place about 45 Vanilla Wafers in a food processor and process until they are fine crumbs.
- Melt butter in the microwave (in a microwave safe dish) for about 30 seconds.
- In a mixing bowl, combine the cookie crumbs and butter together and mix thoroughly.
- Place the cookie crumb mixture into the pan and press down and onto the side of the pan to create a crust. I use a small glass bowl to press the crumbs down and up onto the sides firmly.
- Bake for 10 minutes in the 350F oven.
- Remove from oven and let cool completely.
Once the pie crust is cooled...
- Let CHOCOLATE ice cream soften slightly, just so it is spreadable, and spread into the bottom of the pie crust
- NOTE: I discovered this as I put my last layer of ice cream (Vanilla) on the pie and realized that next time I will do this for each layer.
- Place softened ice cream in a gallon size ziploc bag
- Snip the tip off and add the ice cream to the pie crust in a swirling motion. Start on the outside edge of the pie crust and circle your way into the middle with the ice cream.
- Then spread smooth with a spatula.
- Return pie to the freezer to let the chocolate set/harden up (essentially you are doing this if you want to achieve "clean" layers of ice cream in the pie. If you don't care about the layers appearing clean and even...keep on going!)
- REPEAT above steps with STRAWBERRY Ice Cream.
- REPEAT above steps with VANILLA Ice Cream.
- Return to freezer for 4-6 hours (or overnight)
- The ice cream part of the recipe is complete. You can see the edges of my pie are showing some chocolate. The bananas will cover it...or use mini Vanilla Wafers!

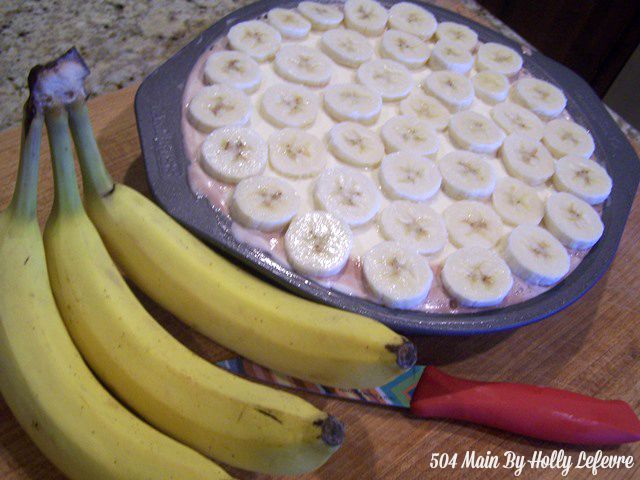
- Just prior to serving, slice the bananas and place them all over the top of the pie.
- Heat the hot fudge and drizzle it over the bananas.
NOTE: It was SUPER HOT the day I made this. I did return the pie to the freezer for about 30 minutes to firm up - it makes it much prettier and easier to cut.
- Use 1-2 Tablespoons of Marshmallow topping on the plate. I made a circle with the back of the spoon. Set the pie in the center of the marshmallow topping.
- Serve with a dollop of whipped cream and a cherry. It might be fun to set out some pineapple, strawberry, and marshmallow toppings to let your guests complete the banana split pie masterpiece!
What's your favorite ice cream dessert?
if you like this recipe, be sure to check out the Mocha Mud Pie recipe!
Thursday, April 23, 2015
Wednesday, March 25, 2015
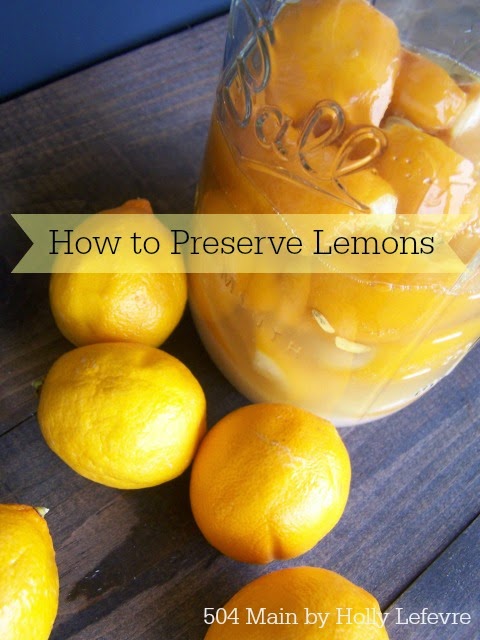
Awhile back a VERY sweet friend gave me a ton of big gorgeous organic Meyer lemons What to do - what to make! These were some of the most gorgeous lemons I had ever seen (for real!). I quickly decided I needed to get cracking...and so I did. I made (Meyer) limoncello, (Meyer) lemon Curd and Preserved (Meyer) Lemons. (no Meyer lemons? ...you can use good ole lemons for this too!)
Monday, December 2, 2013
When it comes to holiday entertaining...think festive...think fun...think bubbles!
And what is more festive than THE Black Bottle Bubbly, Freixenet.
I like my gatherings to sparkle as well as my wine! I was very excited when I received two gorgeous black bottles from Freixenet - one of Cordon Negro Brut, the original Black Bottle Bubbly, and one of Sweet Cuvée, the first line extension to the black bottle bubbles in 20 years! I decided to gather my friends for a pairing party! I came up with some of my own pairing combinations...but Freixenet has a Pairing App to get you on your way!Sunday, April 15, 2012
Hello all!
Guess what? I have another guest today!
I am so excited...I LOVE having guests...
This is some info that I seriously need and
I am pretty sure a lot of you can benefit from too!
If you are not already familiar with Our Crazy Busy Bunch...
run over to Heather's blog and get to know her!
Now, here she is....
___________________________________________
Hi, I am Heather from Our Crazy Busy Bunch. I am a mama, wife, business owner, organizing freak, party planning fool, DIY dork and an amateur photographer.
Thank you so much to Holly for letting me spend a little time on her blog.
Very excited to be here, I la-ove her site!
Today I am going to give you 9 easy tips on how to take awesome looking pictures of food. Food is hard to take pictures of. I never realized just how hard it was until I try to take pictures of a rockin' recipe and I spend most of my time frustrated on how the pictures turn out. I don't get to share the recipe because I am embarrassed by the pictures.
No more of that!
No more of that!
Through trial and error I have come up with some tips to help. They are in no particular order except I think lighting should determine your photo shoot. If it's raining and yucky, your pictures just won't look as fabulous. You know what that means right? Take out!
1. Lighting
As bloggers we usually don't have the luxury of a studio and all of its amenities. I don't think my husband would let me get studio lights so my enchilada recipe pics would look better. This means we have to be creative. The best place to take food pictures is outside. Indirect sunlight is the bomb. You want the sunlight to be facing the dish but angled on the side towards the dish. Picture a baseball diamond. If your food was up to bat, you want your sunlight to come from either 1st base or 3rd base. If you have to take pictures inside, do it during daylight hours. My number 1 rule for lighting is NO flash. Ever. It is tempting when lighting just doesn't seem to be working out but the flash makes the picture too harsh looking. Now tell me you won't use your flash...Pinky promise?
It will take your pictures from this...
To this...ta da Only slightly different but much better color!
Just think how awesome this picture would have been if I didn't use such a dark dish and my dark counter.
It will take your pictures from this...
To this...ta da Only slightly different but much better color!
Just think how awesome this picture would have been if I didn't use such a dark dish and my dark counter.
2. Manual Mode vs. Automatic
Whip out those instruction books if you don't know how to use your camera on manual. It is so very hard to take a good food picture in automatic. If you read any of the old recipe posts on my blog, you will see why! Manual mode and basic knowledge of how to use aperature and shutter speed is 100 times better than automatic. Aperature settings allow you to determine the amount of light being allowed in to the image sensor, basically how much light being let in to the picture. There are lots of excellent beginner tips that explains aperature and shutter speeds. Google or Pinterest the word aperature and you will be pleasantly surprised at how generous people are with the help they are willing to give you. Once you get the hang of manual, you will be so happy with your pictures, not only food but pictures of everything, I promise!
3. Prettying Up Ugly Food
Pea soup; while it is delicious, it is not very attractive. When taking pictures of an ugly food, rely on pretty serving dishes or table scapes. Another trick is to make the majority of the focus not on the food, but on it's surroundings. I found an excellent example of that at Food Republik. I also found a recipe for green pea and basil soup. Win win. The color of the soup is bold and plays off the white bowl. By using a large lipped bowl, they were able to create balance. I also love that they added peas and basil to the top of the soup. By building up the dish, it gives extra texture and draws your eye in.
4. Angle and Depth
Pay close attention to the angle of your pictures. I tend to take all of my food pictures from a bird's eye view. But depending on your food subject you may want to try a variety of angles. Try arranging yourself in different positions around your dish. Taking 20 pictures of one object isn't wrong, in fact it's great practice.
5.Arranging More Than One Dish
I found the above picture on Pinterest and instantly fell in love with it. I never would have thought of putting two dishes inside of one another. So simple yet so beautiful. This picture was sold from the etsy store but there are plenty of other great pictures. Visit Butterfly Food to check them out.
6. Editing
Many photographers don't like to edit photos but there is absolutely nothing wrong with using an editing programs to enhance your picture. I use Photoshop Elements and really enjoy all of the options. Use your photo editing software to change the white balance and adjust the brightness by a skooch (skooch is a technical term in my house). One tip; always keep an original copy in a different folder. That way you can make numerous adjustments but always have your original. I learned this the hard way.
7. Hold Your Camera Steady
This is a really simple fix! If you don't want to use a tripod or have access to one, don't fret! This is a really easy fix. If you are taking close up shots, use your elbows as leverage on the table or ground to stead the camera. If you are standing, hold your arms close to your body and give them a little squeeze. This helps to ensure a steady hand. For my professional work, I do a lot of incident investigations and I use this stance all the time.
8. Practice, Practice, Practice
This is the fun part! You won't get better and learn how your camera works if you don't practice. So not only do you get to cook a lot of new wonderful meals, you get to take a lot of pictures! I find the best way to practice using my camera in manual is to go for a walk and play around with light, shadows and shoot a variety of objects.
9. Tutorials From Photographers
Here are my favorite 3 blogs that have great tips.
There are so many more but these are my go to ones.
There are so many more but these are my go to ones.
The Pioneer Woman
Good luck with your picture taking!!
____________________________________________________
Now those are some tips I could really use!

Thanks Heather.
Be sure to head over and say hi at Our Crazy Busy Bunch!
Good luck with your picture taking!!
____________________________________________________
Now those are some tips I could really use!
Thanks Heather.
Be sure to head over and say hi at Our Crazy Busy Bunch!
Subscribe to:
Posts (Atom)


