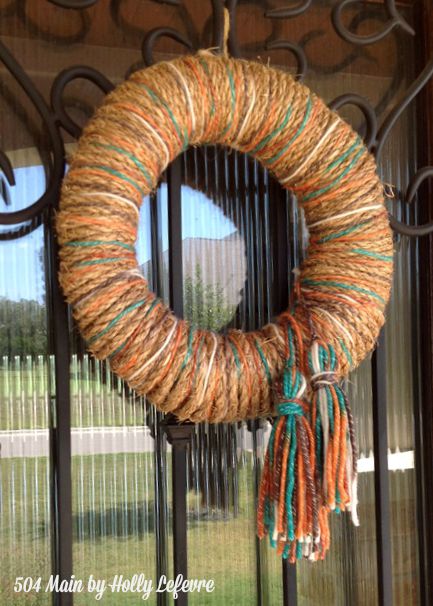
Once upon a time I lived in a quirky beach town where I could do just about anything I wanted to my house. Now I live in a new HOA-governed community and I cannot paint my door crazy colors or have lots of "treasures" hanging out on my porch...so its a good thing I love wreaths...because that is one way I can always personalize my entrance. And I do love a gorgeous wreath!
I have had a big - no ginormous - coffee filter wreath hanging on my door...but it was looking sad...so time to update. I wanted something rustic, but also with some color...and I had to include my favorite Fall accessory...DIY Yarn Tassels!
This really is a quick and easy and inexpensive project...but it looks like a million bucks!
Supplies
- 12" straw wreath form
- NOTE: You can use other forms, but I found the straw worked very well, as it blended with the rope. Later in the tutorial you will see that as you wrap the rope there will be small gaps in the rope and the wreath form may show through. I considered using a grapevine wreath, just know the wreath will not be as round.
- 2 Packages of 1/4" Manila Rope (I bought mine at Home Depot - really inexpensive!), Everbilt brand. 50ft per roll - you will use about 75 feet.
- 1 Skein of yarn - You will not use the entire skein, but you will use most of it, if you decide to embellish with tassels. Specifically I used Yarn Bee in Copper Spice (Hobby Lobby)
- Hot glue/gluesticks
- Straight Pins
- Scissors
Make It
1. Wrap the rope around the wreath form.
Here are a few notes about this step:
- The rope "sheds" so work on a covered surface and in work clothes.
- I did not remove the plastic from my straw wreath form. Next time I might, as there are spaces that show through the rope. It will however be a bit messier. FYI, you can only tell that I left the plastic on if you look at it from about 1/2" away.
- You can work in sections - cutting lengths of rope and wrapping those and then another section and so on...BUT I found it super easy to keep the rope all together and wrap continuously.
b. Press the end of the rope into the glue and let it set.
c. Grabbing your roll of rope in one hand, wrap the rope around the form.
d. Stop every so often to manipulate the rope - push it together at the inside and space it on the outside.
e. If you run out of rope, be sure to also begin the new length on the BACK of the wreath form, same as when you started.
f. As you reach the end of wrapping the wreath, you may notice some overlap on the inside of the form with your rope. Just try to manipulate and spread the rope as evenly as possible. This overlap did not bother me at all, and when you embellish, no one will notice.
g. Glue the end of the rope on the BACK of the wreath.
h. Here is a close up so you can see how much of the form shows through. It is really insignificant if you stop to push your rope together as you wrap (see #f).
3. Add the Yarn and Embellishment:
- I wanted a hint of color. I found this yarn at Hobby Lobby and loved the colors.
- Start in the back of the form and glue (you can pin it if you think you might want to change the yarn) the end of the yarn to secure it.
- Wrap the yarn around the wreath, on top of the rope. I wrapped about every 1". Sometimes I went around 2 or 3 times in an area, sometimes once. Wrap until you reach the end and secure with glue (or a pin).
The wreath looked really pretty as it was - exactly the look I was going for, but my front door is BIG and the wreath needed a bit more of something...so I added DIY tassels!
Grab the tutorial for the DIY Yarn tassels HERE!
You can glue the tassels on, but I used a straight pin, because then I can switch out accessories or tassel colors later.
I love the new look for the front door...and it looks great with my (HOA "approved) front porch decor...I will show ya that in a day or two!
How do you like to decorate your front door?


Holly, I really like this wreath! There are so many possibilities, colors, embellishments,etc. You are so talented and I appreciate your sharing the tutorial for the wreath and for the tassels!
ReplyDelete